By now you’ve probably heard about Camunda’s new Inbound Webhook Connector, which provides a way for applications to start processes on Camunda Platform via HTTP. A favorite tool to invoke HTTP calls is Postman and in this blog entry we’ll discuss how you can create processes using the Webhook Connector and how to start them via Postman both in unauthenticated as well as authenticated modes. Let’s get started.
Creating your Webhook Connector in Web Modeler
We’ll be using Camunda Platform 8 SaaS for the purposes of this post, though the same principles apply for Self-Managed. We’ll create a very simple process and apply the Webhook template for the start event. We’ll then deploy the process and then we’ll start an instance using Postman. We’ll add HMAC authentication to the Webhook configuration, redeploy and update Postman to start an instance using proper authentication.
Log into your SaaS account and open Web Modeler. Create a project if there isn’t one created already, and create a new process diagram. Your screen should look something like the below. I’ve named the process Test Webhook. If you click on the Start event you’ll see a Template section in the Properties panel where you can select among the available Inbound Connectors.

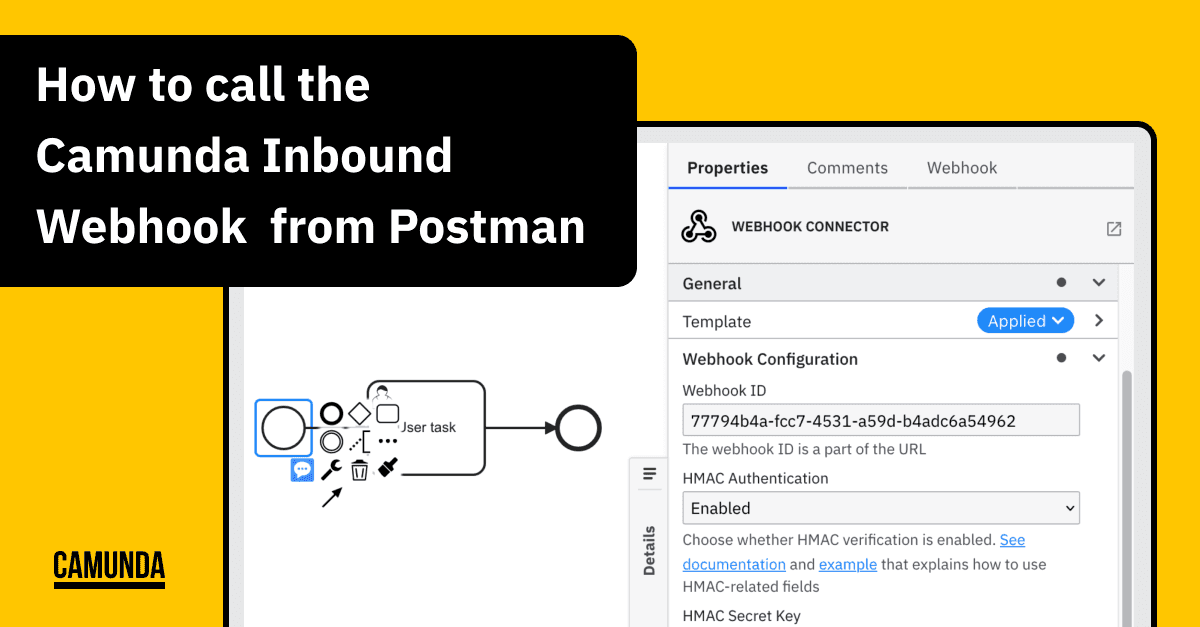
Select Webhook Connector:

After the selection you’ll be brought back to the process canvas, where you’ll see a Webhook ID has been generated. The ID, as we’ll see later, will form a part of the URL that will be called from Postman. You can update the ID if desired. For now, we’ll take the default. We’ll also leave HMAC Authentication disabled (though it’ll be enabled later).

Next, add a User Task and an End Event to complete the process. You may also want to provide a name for your process for easier identification later.

Next, deploy the process to your favorite cluster:

Once the process is deployed we can check back in Web Modeler and get the URL endpoint for the webhook. It can be found in the Webhook tab of the right side panel when you click on the Start event. You’ll notice the Webhook ID forms the last bit of the URL. The other ID after connectors.camunda.io is your cluster ID. We’ll use this URL in Postman to kick off a new instance. You can copy the URL by clicking on the copy icon in the upper right corner
.

Starting our process with Postman
Be sure to download and install Postman. Create a new request, change the method to POST and paste the URL. Click on Send and it should be successful:

Check Operate to ensure the process has started:

Enabling authentication in the Connector
It’s not a good idea to deploy processes using Inbound Connectors without authentication. So now let’s configure a secret in the cluster, enable authentication on the Webhook Connector, use that secret in the Connector configuration, and properly hash that secret in Postman to be able to send an authenticated request.
Creating a secret in the cluster
Go to your Cloud Console and navigate to your cluster and then to the Connector Secrets tab.

Click on Create new secret. Be sure to put in hmacSecret for the Key. The Value can be anything you want. Just be sure to remember it for later. By default the Value is obscured, password style, but can be exposed by clicking on the eye icon. Click on Create.

Your screen should look something like this:

Updating Web Modeler for authentication
Head back to Web Modeler. Open the Properties of the Start event and enable HMAC Authentication. Once you do that you’ll notice additional fields appearing. The first is HMAC Secret Key. This is the key that is shared between the Connector and applications calling upon the Connector. Enter the name of the secret we just created, hmacSecret, and be sure to preface it with secrets. so that the engine knows to look for the value among the Connector Secrets.
Next, we’ll define where in the request header the hashed secret from the calling application can be found using the HMAC Header parameter. Let’s use HMAC-Header for the value of the parameter although it can be anything you want. The last field, HMAC Algorithm, defaults to SHA-256 and can be left as-is. Be sure to Deploy the updated process. Check Operate to ensure there is a second version of your process.

Updating Postman for authentication
So now we need to hash the secret and store it in the header if we want to be able to start a process. If you click on Send in Postman now you’ll get a message saying the Connector isn’t authorized:

Let’s fix that.
Included in the libraries of Postman is crypto-js, a JavaScript library of various crypto standards. We’ll use the SHA-256 protocol to encrypt a blank message with the key (aka secret) we defined earlier in the cluster. Using the Pre-request Script tab of the call in Postman, enter the following code:
var bytes = CryptoJS.HmacSHA256(pm.request.body.raw, 'thisisnotverysecret');Now we need to transform the bytes into a hex string suitable for an HTTP request:
var hex = CryptoJS.enc.Hex.stringify(bytes);Lastly, put the hex string into the request header. The name of the header needs to match what was defined in the Connector.
pm.request.headers.add({
   key: "HMAC-Header",
   value: hex
});
The code in the Pre-request Script should look something like this:

Click on Send and this time it should work:

Check with Operate to ensure a new instance running version 2 has started:

And there you have it, a tutorial on how to use and call Camunda’s Inbound Webhook Connector.
Key Takeaways
Camunda 8 SaaS is an easy way to begin, or even continue, your process automation journey. You can create, manage, simulate, deploy, run, and analyze processes without having to download anything. Create your free 30 day trial today and get started within minutes. You can also read about Camunda’s newest Inbound Connectors on our blog here. In this tutorial, you learned how to create, deploy, and call an Inbound Connector in a secure fashion using Postman.


