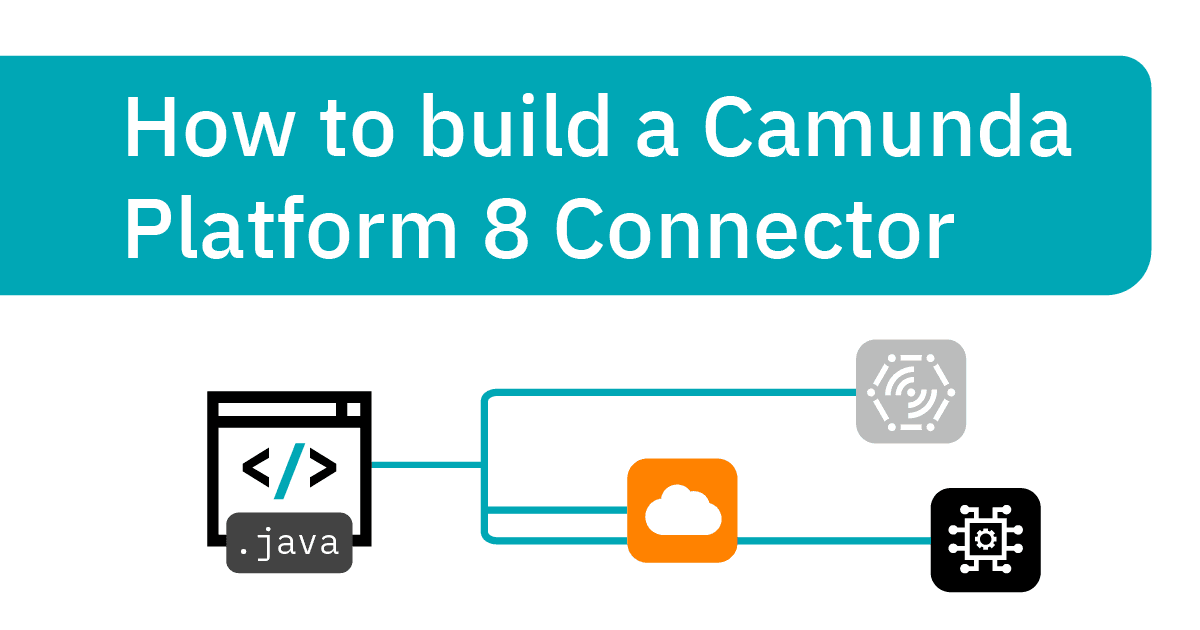
Learn how to build a Camunda Platform 8 Connector from Camunda Developer Advocate Josh Wulf. In this tutorial you’ll see how you can quickly start building your own custom Connectors using Camunda today.
We’re excited to announce a Connector SDK, a new set of developer tools for Camunda Platform that help developers quickly build and test custom Connectors in any environment – as well as share the connectors with others to use.
Connectors provide multiple benefits. They are modular and designed for reuse, and they enable processes to communicate with any system or technology. These capabilities reduce the time it takes to model, implement, and automate business processes.
Note: Want to better understand the basics of Connectors before diving in? Check out this free brief Connector overview course (30m) in Camunda Academy.
With the Connector SDK you can:
- Build and test a custom Connector.
- Replace secrets for the outside system.
- Use a runtime provided by Camunda in your self-managed environment.
- Build your own runtime to use in your self-managed or SaaS environment.
- Share the newly built custom Connector within projects in your org for others to use.
- Reference documentation on the SDK and follow best practices to connect to outside systems.
The Connector SDK adds the option of creating new custom Connectors in addition to the existing selection of Camunda Platform 8’s out-of-the-box Connectors. Connectors enable processes to interface with different types of endpoints such as APIs, RPA bots, CRM and ERP platforms, user-facing applications, and so on. If you’re using Camunda Platform 8, you might already be using the REST Connector for making API calls, the Slack Connector for sending messages to channels, users in your Slack workspace or the SendGrid Connector for sending emails or the Google Drive, Amazon SQS or AWS Lambda connectors.
Now, with the Connector SDK you can create your own custom Connectors that exactly fit your needs. You can share the custom Connector within your organization or with the Camunda community, so that your team doesn’t have to start from scratch every time they need to work with a particular endpoint/outside system. Connectors are user-friendly, so anyone in your organization can take advantage of them when designing their BPMN diagram. Connectors are used through connector templates.
For a guided tour of the connector architecture see this blog post by Bernd Ruecker.
In this blog post, we’ll walk through the process of creating your first custom Connector.
Note: If you don’t currently have a license for Camunda, you can sign up for a free trial of Camunda 8 today to follow along right away.
The scenario
We will create a connector that calls a specific REST API. There is a generic REST API connector available out of the box with Camunda Platform 8. However, if you have specific services that are accessed over REST, you can create connectors that are preconfigured for that service, doing more of the configuration lifting and providing more semantics in your model.
In this case, we are going to create a connector that retrieves the weather forecast from the OpenWeather API, based on a location provided in the variable payload. We can imagine the output of this connector being used as input for a decision table.
The completed connector is available in the Camunda Community Hub on GitHub, here: https://github.com/camunda-community-hub/camunda-8-connector-openweather-api.
Create a Connector template
The first step in creating your custom connector is to create a connector template.
The connector template is the definition of the custom modeling element that users can place into models to use your custom connector.
We’re going to create a new connector template and deploy it into the Web Modeler in Camunda Platform 8 SaaS.
You can do this with the Desktop Modeler. For the specific instructions on using the Desktop Modeler, see the section Connector templates in the Desktop Modeler.
Let’s go!
Log in to the Camunda Platform 8 SaaS Web Console.
In the Web Modeler, choose New > Connector Template

Change the name of the connector template by clicking the name in the breadcrumbs, and selecting Edit Name.
Here, you can see that I have this connector template in a folder called Connector Demo, and I have given it the name Get Weather Forecast. This updates the name in the JSON editor.

The connector template is written as a JSON object. This section of the documentation describes creating a connector template, and gives an example of the schema that is used. The entire JSON Schema for element templates is available here, and a human-readable description is available here.
The JSON editor uses Monaco, the editor component from VS Code. This gives it rich IntelliSense, linting, and even formatting.
We are going to add various configuration properties to the connector: the values for latitude and longitude, the units (metric or imperial), and the output variable to store to result into.
The OpenWeather API takes a latitude and a longitude as parameters. So let’s add values for these:
"properties": [
  {
    "label": "Latitude",
    "description": "The latitude for the weather report location.",
    "type": "String",
    "value": "=latitude",
    "feel": "optional",
    "binding": {
      "type": "zeebe:input",
      "name": "latitude"
    },
    "constraints": {
      "notEmpty": true
    }
  },
  {
    "label": "Longitude",
    "description": "The longitude for the weather report location.",
    "type": "String",
    "value": "=longitude",
    "feel": "optional",
    "binding": {
      "type": "zeebe:input",
      "name": "longitude"
    },
    "constraints": {
      "notEmpty": true
    }
  }
]
By specifying these fields as “feel”: “optional” we allow our connector to take a concrete value in a model, or to derive it from a process variable mapping via a FEEL expression.
The description is the opportunity to provide inline documentation for people who use your connector template while modeling (including your future self).
Now, let’s add a drop-down to select the units – here we do not show the previous properties that we added:
"properties": [
  {
    "label": "Units",
    "description": "The units used in the weather forecast results",
    "type": "Dropdown",
    "value": "metric",
    "binding": {
      "type": "zeebe:input",
      "name": "units"
      },
    "choices": [
      { "name": "Imperial", "value": "imperial" },
      { "name": "Metric", "value": "metric" }
    ]
  }
]
Now, we add a field for the OpenWeather API Key to use. Rather than binding this to a payload variable – which will be exposed in the exporter stream from the engine, in Operate, and to job workers in the process – we will bind it to a secret that can be replaced at runtime. To do that, we take a concrete value, and we’ll let the user know to use one in the format secrets.SECRET_NAME.
The secret format is a convention. The Connector SDK provides a method that replaces any concrete values of this format (secrets.XXXX) with a provided secret at execution time.
Users of our connector could put the concrete API key in their model in this field, and it will work – however, this would leak the API key with the model.
"properties": [
  {
    "label": "OpenWeather API Key",
    "description": "The OpenWeather API Key to use",
    "type": "String",
    "value": "secrets.OPENWEATHER_API_KEY",
    "binding": {
      "type": "zeebe:input",
      "name": "apiKey"
    },
    "constraints": {
      "notEmpty": true
    }
  }
]
Here is the preview of our connector template’s custom property panel now:

Now, we will add the field to define how our connector’s result is merged into the process variables. We do this by allowing the user to specify a value for the custom header resultVariable:
"properties": [
  {
      "label": "Result Variable",
      "description": "Name of variable to store the response in",
      "group": "output",
      "type": "String",
      "value": "weather",
      "binding": {
        "type": "zeebe:taskHeader",
        "key": "resultVariable"
      }
    }
]
Connector runtimes use this value when completing jobs.
There is one more property that we need to add to our connector. This is a hidden property that binds this task element to a task type. This will be the task type that workers will subscribe to, to service jobs of this task type. See the documentation here for more information.
Add the following to the properties array:
{
 "type": "Hidden",
 "value": "io.camunda:weather-api:1",
 "binding": {
   "type": "zeebe:taskDefinition:type"
 }
}
Our workers will need to subscribe to the task type “io.camunda:weather-api:1” to get jobs for this task type.
You can optionally upload a custom icon, using the button at the top of the editor. The icon file is base64 encoded and embedded into the JSON. I used a free icon from flaticon.com.
Now we can publish the connector template. Click the big blue Publish button, and be blessed!

You can give your connector template an optional version when publishing.
Use the Connector template in a model
Now create a new BPMN Model in the editor, and add a task directly after the Start Event.
When you click the wrench icon to change the Element type, at the bottom of the list of options, you will now see your custom connector element:

If you don’t see this, then select Service Task, and then in the properties panel click on +Select in the Template section, and choose the connector template there.
When you select this, you’ll see the custom properties defined in the connector template:

New versions
When you publish a new version of the connector template, your models will offer you an option to update to the new version:

Implement the Connector functionality
The next step is to implement the connector functionality.
The Connector SDK provides the framework for implementing a connector function. The connector function is an environment agnostic implementation, which means that we can deploy it in a number of ways – as a Zeebe worker, or using a connector bridge as a Lambda function.
We are going to run our connector in the Job Worker Connector Runtime.
To begin, use the connector template repo here to create a new repository.
Clone the repo locally, and let’s get to work customizing it.
The first thing we can do is add our connector template from the Web Modeler. This means that the connector template lives with the connector implementation in a single place, allowing for systematic deployment.
Copy the JSON of the connector template from the Web Modeler, and paste it into the file `element-templates/template-connector.json`.
Now, edit the pom.xml file and update the artifact name, id, and description:
<name>openweather-api</name>
<description>OpenWeather API Connector</description>
<groupId>io.camunda.connector</groupId>
<artifactId>openweather-api</artifactId>
<packaging>jar</packaging>
<version>0.1.0-SNAPSHOT</version>
The Connector function
Refactor MyConnectorFunction.java to rename it to OpenWeatherAPIFunction.
This connector runtime will create an instance of this class and call its execute method.
Deserialize variables
The connector function execute method receives an OutboundConnectorContext as its input parameter. This has a method getVariablesAsType that we can use to deserialize the variables of the incoming job.
The getVariablesAsType method takes a class as its input parameter. The variables of the payload are then deserialized into the properties of the class. If you look into the source code of the runtime in the Connector SDK, you’ll see that this is the method from the job object in the underlying Java Zeebe client.
We can use getVariablesAsType to deserialize the payload variables into an object that we can use at runtime.
Refactor MyConnectorRequest.java to rename it to OpenWeatherAPIRequest.
Now, we implement the object to achieve the deserialisation (see here for the complete source code):
public class OpenWeatherAPIRequest {

 private String latitude;
 private String longitude;
 private String units;
 @Secret
 private String apiKey;

  // getters and setters
}
Note that the apiKey field is annotated as @Secret. This allows the value to be substituted at runtime using a secret store. We will look at how this is done later.
Implement the Connector function
Let’s now implement the connector function.
First, refactor MyFunction to rename it to OpenWeatherAPIFunction.
Making the Connector discoverable to the runtime
At runtime, the connector runtime will scan our connector jar for an SPI configuration. We need to edit the file src/main/resources/META-INF/services/io.camunda.connector.api.outbound.OutboundConnectorFunction to specify to the connector runtime where our connector function is. Edit the file and change the content to io.camunda.connector.OpenWeatherAPIFunction.
Our connector function needs to implement io.camunda.connector.api.outbound.OutboundConnectorFunction.
We also need to annotate our Connector implementation with the @OutboundConnector annotation, where we provide the metadata needed for runtime configuration:
@OutboundConnector(
       name = "OpenWeatherAPI",
       inputVariables = {"latitude", "longitude", "units", "apiKey"},
       type = "io.camunda:weather-api:1"
)
public class OpenWeatherAPIFunction implements OutboundConnectorFunction {
Here, type refers to the task type that our connector will service. This needs to match the value provided for zeebe:taskDefinition:type in the connector template. This is how Zeebe knows to use this connector implementation for tasks that use your connector template in the model.
The inputVariables field is important. This is passed to the runtime and informs the fetchVariables parameter of the connector worker. If you do not specify a variable name here, that variable will not be visible to the connector at run-time, even if it is present in the process variables.
Connector logic
We will implement our connector with the same separation of concerns as the template – namely dealing with the variables and secret substitution in one function, and putting our domain-specific business logic (the OpenWeather API call) in another function.

First, the execute method:@Override
public Object execute(OutboundConnectorContext context) throws Exception {
var connectorRequest = context.getVariablesAsType(OpenWeatherAPIRequest.class);
context.replaceSecrets(connectorRequest);
return executeConnector(connectorRequest);
}Here we deserialize the payload variables using our helper class. We then call context.replaceSecrets to replace the secrets token with the actual OpenWeather API Key.
Now we implement the executeConnector method:
private OpenWeatherAPIResult executeConnector(final OpenWeatherAPIRequest connectorRequest) throws IOException {
 LOGGER.info("Executing OpenWeather API connector with request {}", connectorRequest);
 String urlString = "https://api.openweathermap.org/data/2.5/weather?appid=" + connectorRequest.getApiKey() +
         "&lat=" + connectorRequest.getLatitude() + "&lon=" + connectorRequest.getLongitude();
 URL url = new URL(urlString);
 HttpURLConnection http = (HttpURLConnection)url.openConnection();
 http.setRequestProperty("Accept", "application/json");

 http.disconnect();

 String weatherReport;
 if (http.getResponseCode() == 200) {
   weatherReport= convertInputStreamToString(http.getInputStream());
   LOGGER.info("Weather report" + weatherReport);
 } else {
     LOGGER.error("Error accessing OpenWeather API: " + http.getResponseCode() + " - " + http.getResponseMessage());
     // Throwing an exception will fail the job
     throw new IOException(http.getResponseMessage());
 }

 var result = new OpenWeatherAPIResult();
 result.setResult("{\"code\": " + http.getResponseCode() + ", \"forecast\": " + weatherReport + "}");
 result.setCode(http.getResponseCode());
 return result;
}
The result is assigned to a Java object that can be serialized to JSON. See the source code for it in the connector source code on GitHub.
Running the Connector
Our connector needs to run in a connector runtime. The connector runtime invokes our code in response to available work, and manages the replacement of secrets.
We will use the Connector SDK’s Job Worker Connector Runtime. This runtime starts a job worker that wraps our connector’s function, invoking it when the worker receives a job from the engine.
There are several options for integrating our connector with the runtime environment. Including the runtime in our connector as a maven dependency and then explicitly wrapping our connector function is one option. This method couples our connector with the runtime environment, however.
You could check out the Connector Runtime from GitHub, and build the runtime-job-worker subdirectory, then run the resulting jar, or download the latest stable build of the jar from maven central.
We are going to do it using a decoupled approach – the Docker one, where the coupling takes place via the deployment, and the discovery mechanism of the SPI is used by the connector runtime to load our connector.
This is a more devops way to do it – using the pre-built Docker image and mounting the connector jar into it.
You can check out the complete connector source code from this repository. Build the connector using the command: mvn package.
In the connector project root directory, we have a shell script to start Docker, docker.sh:
#!/bin/bash
docker run --rm --name=connectors -v $PWD/target/openweather-api-0.1.0-SNAPSHOT.jar:/opt/app/connector.jar --env-file env.txt camunda/connectors:0.2.0
Create a set of API credentials in the Camunda SaaS console. Put them into the env.txtfile. Get an API key from OpenWeather, and put it in the env.txtfile.
These environment variables will be injected into the Docker container and will be available to the connector runtime. The connector runtime will use the Camunda API credentials to connect a job worker to the cluster to retrieve jobs. The connector runtime will use the OpenWeather API key to replace the secret at runtime.
To start the connector runtime with our connector loaded, run the `docker.sh` script. This will pull the Docker image, and then start it with our connector mounted into the discovery directory and our secrets loaded into the container environment.
When you run docker.sh – assuming you have Docker installed and configured – you will see the connector runtime start, and load our connector:
Oct 09, 2022 11:04:46 PM io.camunda.connector.runtime.jobworker.Main lambda$main$0
INFO: Registering outbound connector OutboundConnectorRegistration { name=OpenWeatherAPI, type=io.camunda:weather-api:1, function=io.camunda.connector.OpenWeatherAPIFunction, inputVariables=[latitude, longitude, units, apiKey] }
Oct 09, 2022 11:04:46 PM org.camunda.feel.FeelEngine <init>
INFO: Engine created. [value-mapper: CompositeValueMapper(List()), function-provider: org.camunda.feel.context.FunctionProvider$EmptyFunctionProvider$@1e63ec0b, clock: SystemClock, configuration: Configuration(false)]
The connector template is in the connector repository. Upload this element template to the Cloud Modeler in your cluster. Make sure that you use the Cloud Modeler in the same cluster as the API credentials that you created. You want the connector template, the process instance, and the connector runtime all using the same cluster.
There is an example BPMN model in the connector repository.

This model has the latitude and longitude for Berlin hardcoded into the model. Upload it to the Cloud Modeler, and then click Deploy diagram, then Start instance. You need the connector template deployed in the same cluster, so make sure that you upload the connector template prior to deploying this model.
This will start an instance of the process, and you should see the connector making the call to the OpenWeather API.
Oct 09, 2022 11:05:01 PM io.camunda.connector.runtime.jobworker.api.outbound.ConnectorJobHandler handle
INFO: Received job 2251799817140085
Oct 09, 2022 11:05:01 PM io.camunda.connector.OpenWeatherAPIFunction execute
INFO: Pre-secret replacement: OpenWeatherAPIRequest [latitude=52.520008, longitude=13.404954, units=metric, apiKey=secrets.OPENWEATHER_API_KEY]
Oct 09, 2022 11:05:01 PM io.camunda.connector.OpenWeatherAPIFunction executeConnector
INFO: Weather report{"coord":{"lon":13.4,"lat":52.52},"weather":[{"id":800,"main":"Clear","description":"clear sky","icon":"01n"}],"base":"stations","main":{"temp":281.83,"feels_like":279.74,"temp_min":278.79,"temp_max":283.95,"pressure":1012,"humidity":80},"visibility":10000,"wind":{"speed":3.58,"deg":110,"gust":4.92},"clouds":{"all":0},"dt":1665356655,"sys":{"type":2,"id":2009543,"country":"DE","sunrise":1665379350,"sunset":1665419046},"timezone":7200,"id":6545310,"name":"Mitte","cod":200}
In Operate, you will see the completed process instance, with the weather report in the process variables:

If things didn’t go well, go back and check all the steps. Read the SDK documentation and the README in the Connector SDK repository.
If you still can’t get it to work, check the Camunda Forum for existing posts, and if no one else has encountered your issue, ask a question.
Connector templates in the Desktop Modeler
You can use connector templates in the Desktop Modeler.
The Desktop Modeler (as of version 5.4.1) does not offer the option to create connector templates. You can create and edit connector templates in VS Code. This gives you access to autocompletion and linting. Create the file with a .json file extension, and start it with this content:
{
   "$schema": "https://unpkg.com/@camunda/zeebe-element-templates-json-schema/resources/schema.json",
   "name": "Get Weather Forecast",
   "id": "d0217850-b338-42ba-bcaa-1c20d16670b7",
   "appliesTo": [
       "bpmn:ServiceTask"
   ],
   "properties": [
   ]
}
The $schema value provides VS Code with the information it needs to lint and autocomplete the file.
To use connector templates in models in the Desktop Modeler, create a sub-directory .camunda/element-templates/ in the directory where the model is saved on the local filesystem, then copy the connector template file in there. This will allow the Desktop Modeler to pick up the connector template when you open the model.

Summary
In this guided tour, we created a connector template, deployed it, implemented a connector to retrieve the weather report from the OpenWeather API, started the connector using the Camunda Job Worker Runtime using Docker, deployed a model that uses the connector, and then executed an instance.
There are a number of different paths that we could have taken – running instances using initial variables in place of hardcoded values, validating the process variable input in the connector, or starting the connector using a different method.
These are all avenues for further investigation. I’m excited to see what connectors you create! If you don’t currently have a license for Camunda, feel free to sign up for a free trial of Camunda 8 today and get started building your own Connectors! You can share your creations at the Camunda Community Hub.


