Many customers use Red Hat OpenShift internally as their Kubernetes installation of choice. Since version 8.1, you can install Camunda Platform 8 on OpenShift with more ease, which is described in detail in the documentation. Today’s blog post will sketch the big picture and then walk you through a sample installation step-by-step.
The big picture
Camunda Platform ships a few Components to maximize the available features.
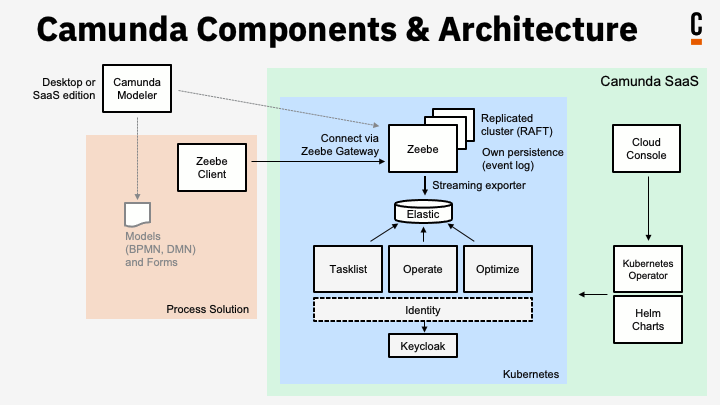
To ease management of the Components outlined above and their integrations, the preferred environment to run Camunda Platform 8 in is Kubernetes (which is not completely true, by the way, the recommendation is to simply use our SaaS offering, but if this does not work for you, running on Kubernetes is the second-best choice). You can read more about all deployment options in the documentation.
There are Helm charts available to properly install all components into Kubernetes. While we internally use a Kubernetes Operator for our own SaaS offering, this is not yet available for Self-Managed environments.
These Helm charts are also exactly what you can use on OpenShift. Let’s look at the process step by step next.
Step-by-step installation
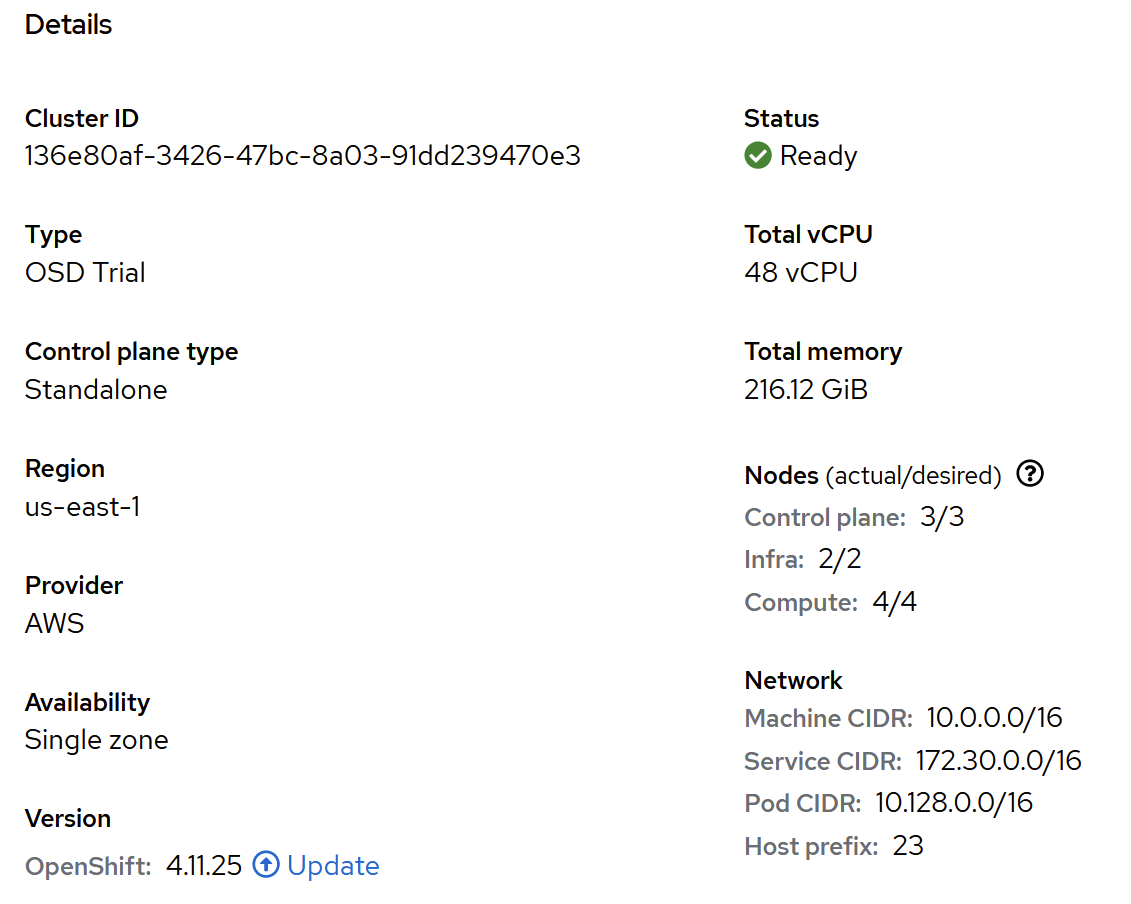
For this blog post, ensure you have access to an OpenShift installation (see version compatibility). I will show the installation using the managed version of OpenShift from Red Hat. I created a dedicated cluster backed by four AWS EC2 instances (m5.xlarge) using the web console, which results in the following OpenShift cluster:
To install Camunda, I leverage Helm. The whole process is described in more detail at https://docs.camunda.io/docs/self-managed/platform-deployment/helm-kubernetes/deploy/. To summarize, install the correct chart providing the correct configuration values (and read on for some specialties for OpenShift mentioned later):
helm repo add camunda https://helm.camunda.io
helm install camunda-platform camunda/camunda-platform -f openshift.yaml -f values.yaml
Note that we will step through the configuration values later in this document.
I know most folks will love doing this using the command line or terminal. Still, I actually decided to try out the OpenShift web interface for this task as I was curious how well that works and if I can avoid the command line altogether. You can. Here is a recording of the whole setup:
Let’s take this step by step:
1. I created a new project (basically a namespace in Kubernetes lingo):

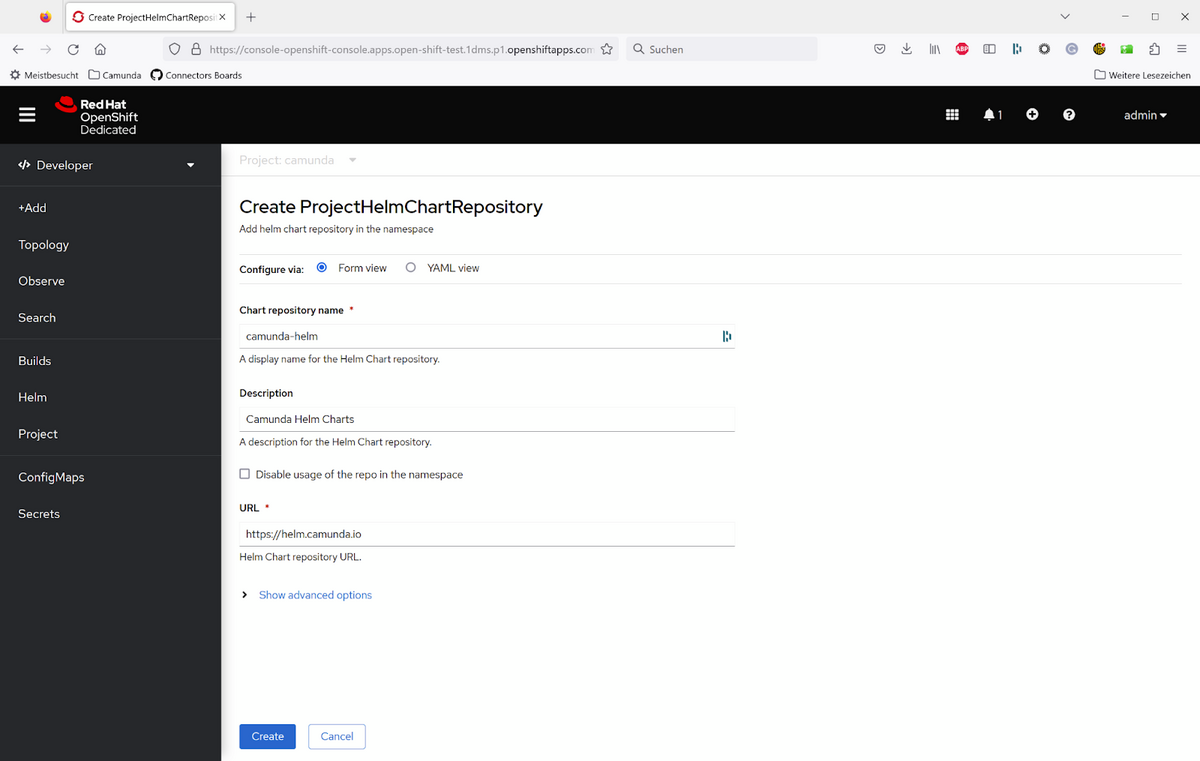
2. I added the Camunda Helm chart repository (helm repo add camunda https://helm.camunda.io):
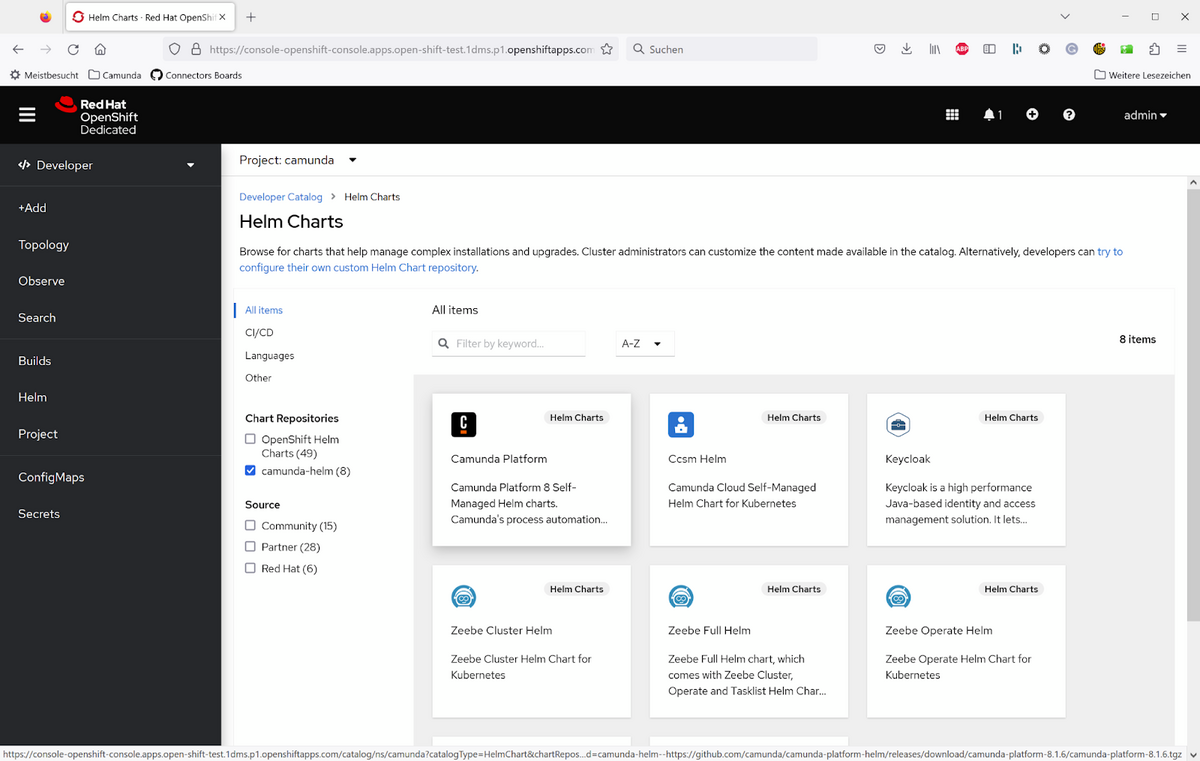
3. This gave me an easy possibility to pick and install the Camunda Platform (helm install camunda-platform camunda/camunda-platform):
So far, this is plain Kubernetes. Now, we’ll briefly discuss the specifics of OpenShift.
OpenShift defines Security Context Constraints (SCC) to manage permissions for pods and containers. For example, the default policy in OpenShift does not allow a container to run as root. Additionally, it defines a specific user id range to be used.
These default settings will require modifications on the Helm charts for deployment to avoid security restrictions. Basically, you have three options:
- Disable security restrictions and allow unrestricted deployments. While this is probably not your choice in production, it can be the easiest way forward during development. It is what I did for this blog post, so I added a RoleBinding for the role
system:openshift:scc:privilegedto the ServiceAccountdefaultandcamunda-platform-key. With this, you can use the Helm charts out of the box. - Set proper user ids for all containers as described in the documentation.
- Let OpenShift add the Security Context to all pods automatically. Therefore, no security settings must be present, which is true for Camunda components but not for third-party containers like Elasticsearch or PostgreSQL. Due to a known bug in Helm, it is unfortunately not super straightforward to remove values from the default charts on your own, but it is doable, as described in the documentation.
Note that you can adjust the Helm chart via the OpenShift console, but the workaround mentioned above only works via the command line. Anyway, I merged the default values with the OpenShift-specific ones manually and then copied the YAML into the web console:
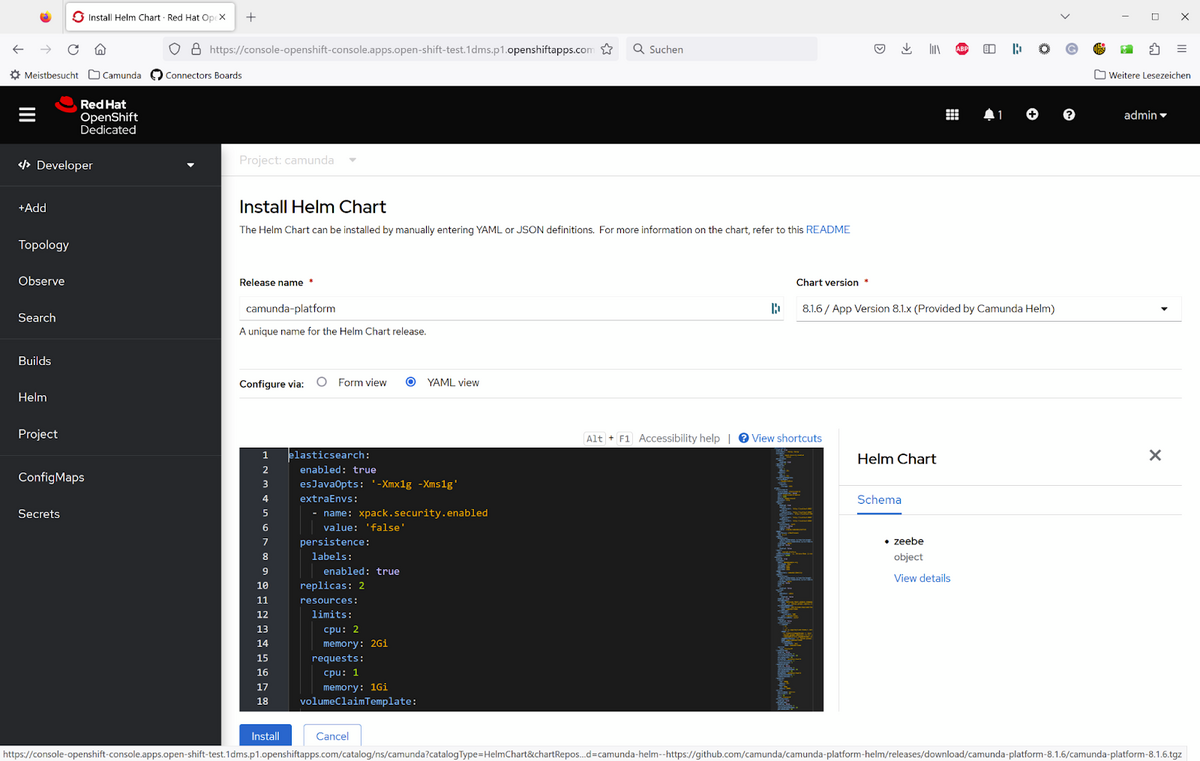
You can find the YAML file I used here:
https://gist.github.com/berndruecker/09e486e8fad97631ba159f8956c80b37
Note that this YAML contains full URL endpoints for some applications to do proper redirects on authentication, which you need to adjust when installing on your own cluster (as I hope you will have a different domain name than me ;-)).
Applying the chart installs all necessary components for Camunda Platform 8 into your OpenShift cluster. When done, the web console directly jumps to a nice topology view:
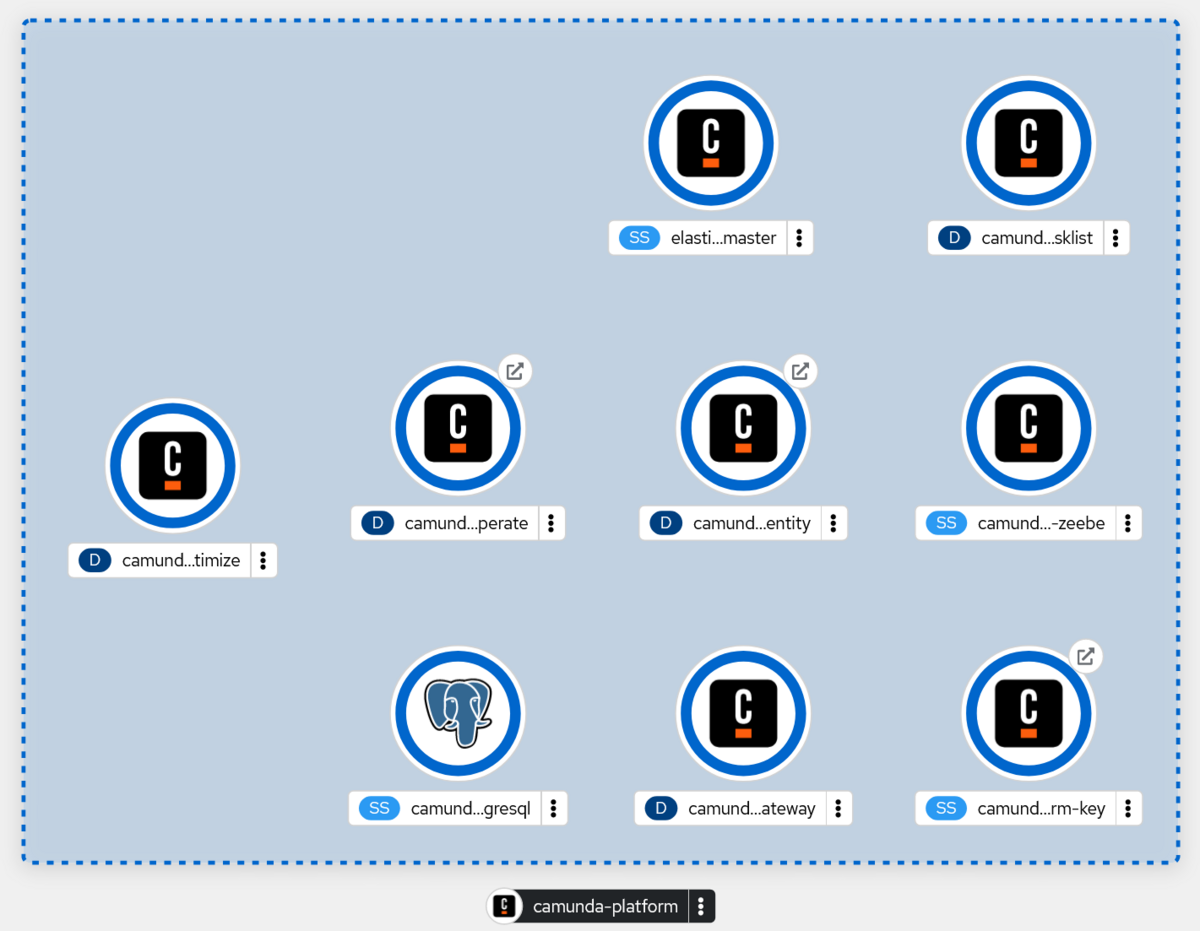
If everything goes well, you should not see any errors here. Congratulations, Camunda is now properly running on your OpenShift cluster!
To access the web applications of Camunda, you need an ingress. OpenShift knows a proprietary concept here which is called Routes. So let’s add a route for the various web applications, which is really straightforward as you just point it to the right services. For example, with Operate this looks like the following:
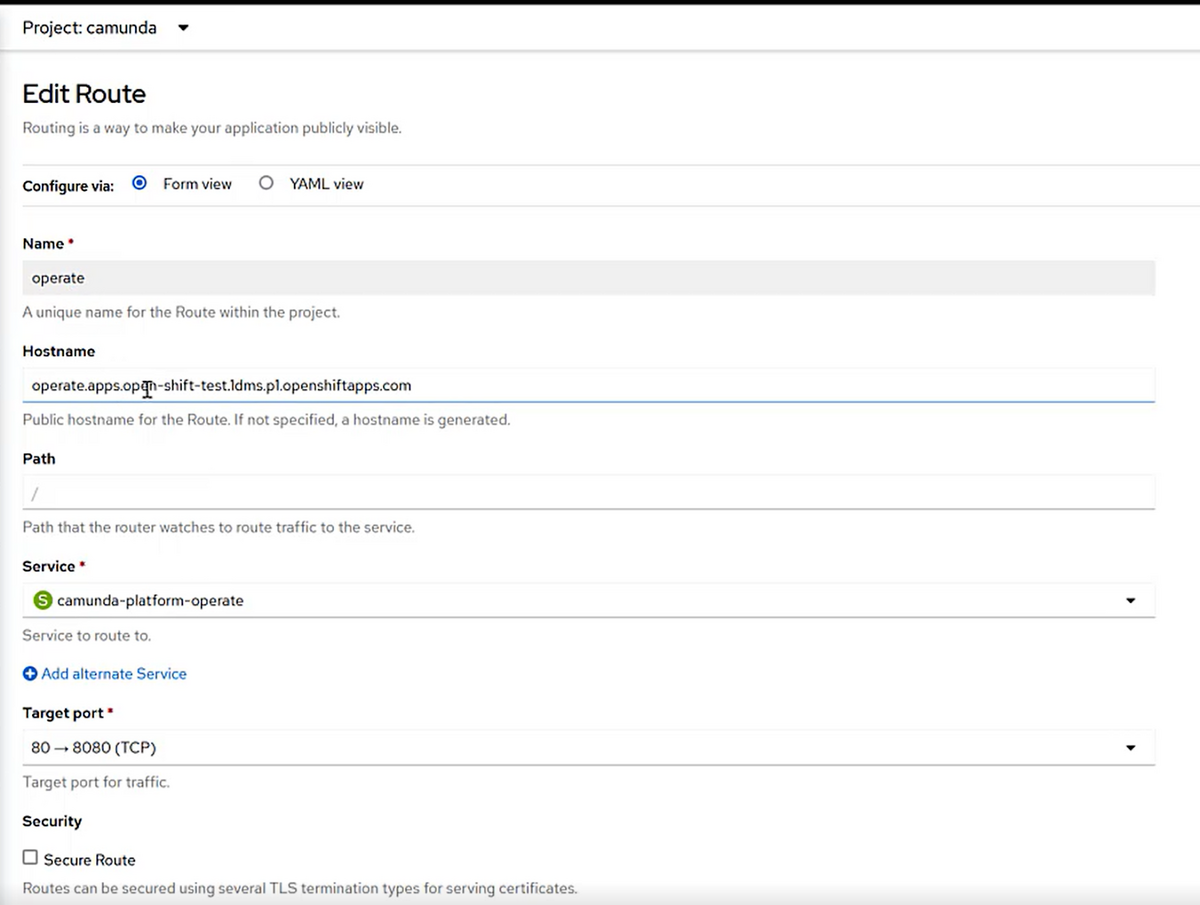
On this page, you will also see the URLs, which should fit the URLs you configured in your YAML earlier on.
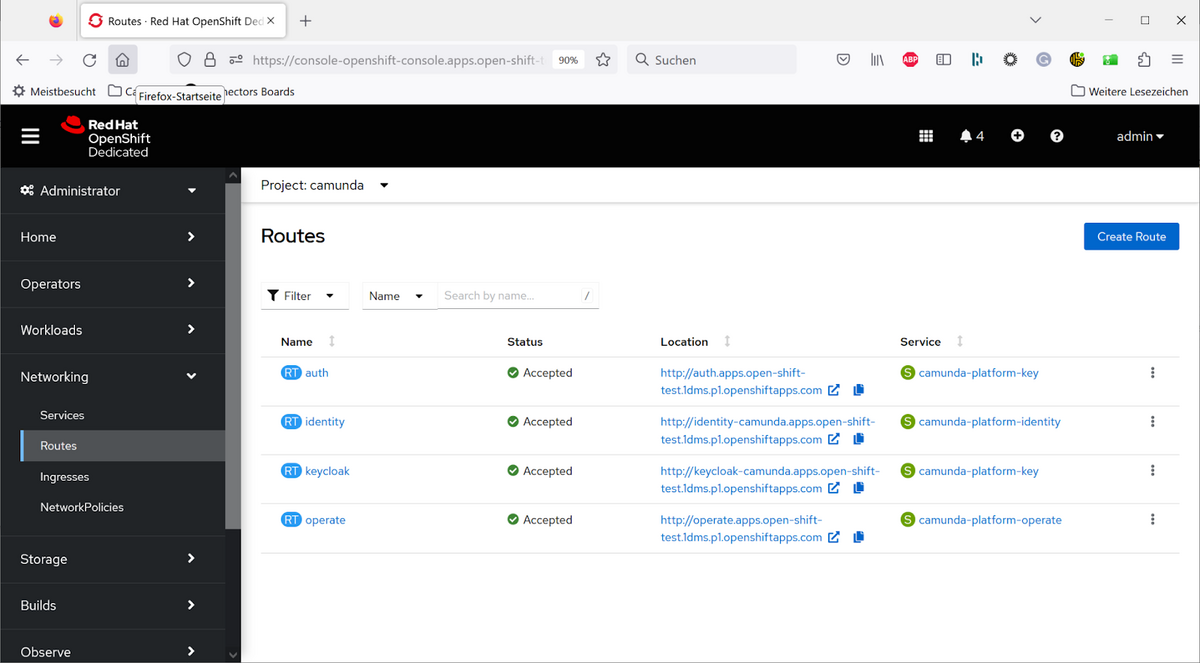
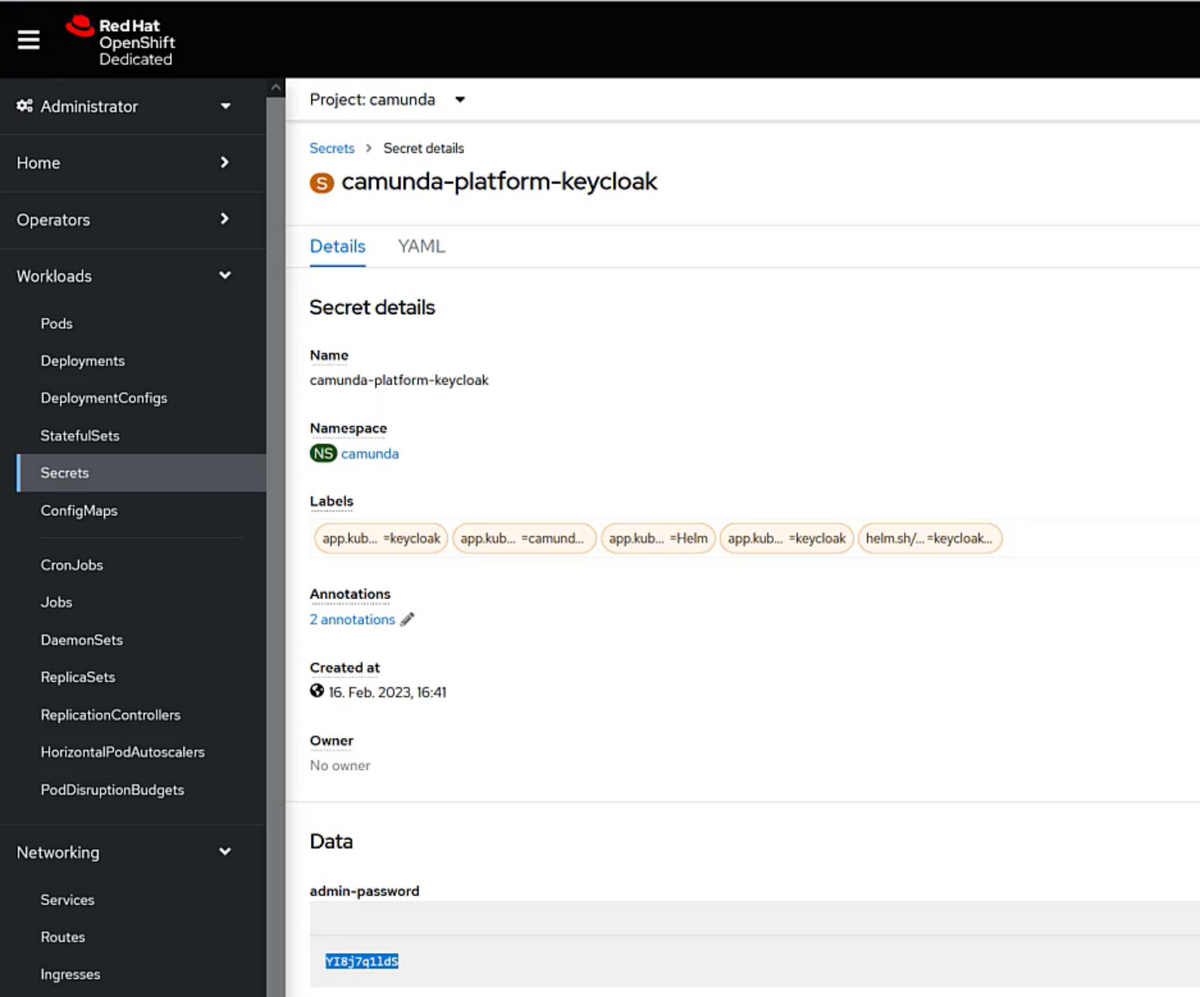
That’s it. Now Camunda Platform 8 is running properly and the web applications are reachable. You can either log in using the default demo user (user: demo, password: demo) or you can also add your own users to Keycloak. Therefore, go to the Keycloak website (In my case: http://keycloak-camunda.apps.open-shift-test.1dms.p1.openshiftapps.com/auth/admin/master/console/) and log in with your admin credentials (username: admin), the password can be checked via the Secrets stored in OpenShift:
Now, add a user of your choice and directly set a password:
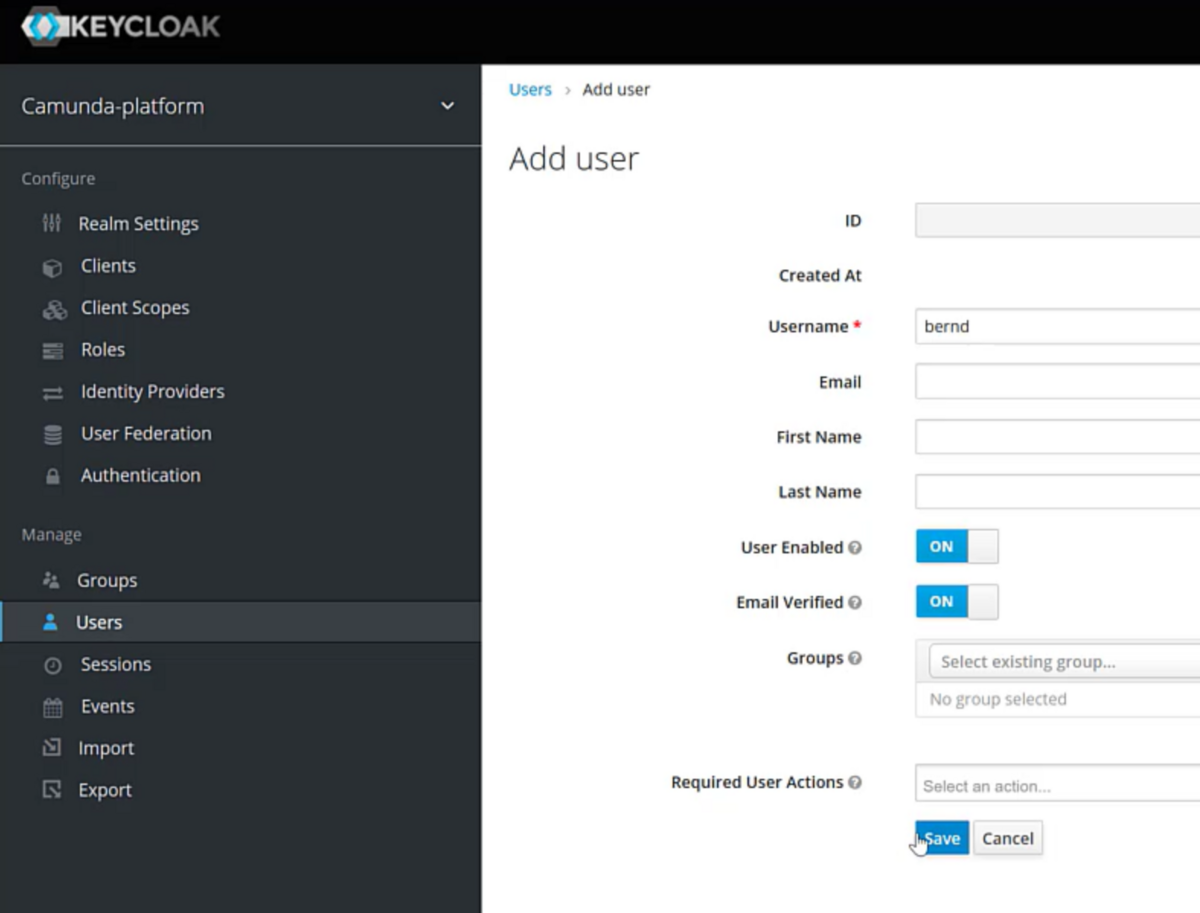
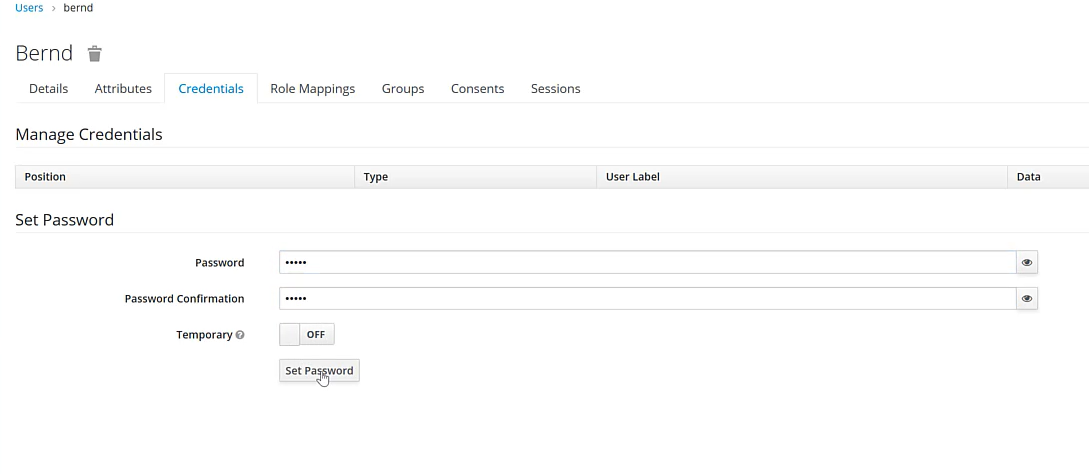
Ensure you assign the necessary roles to that user so they can log in afterwards:

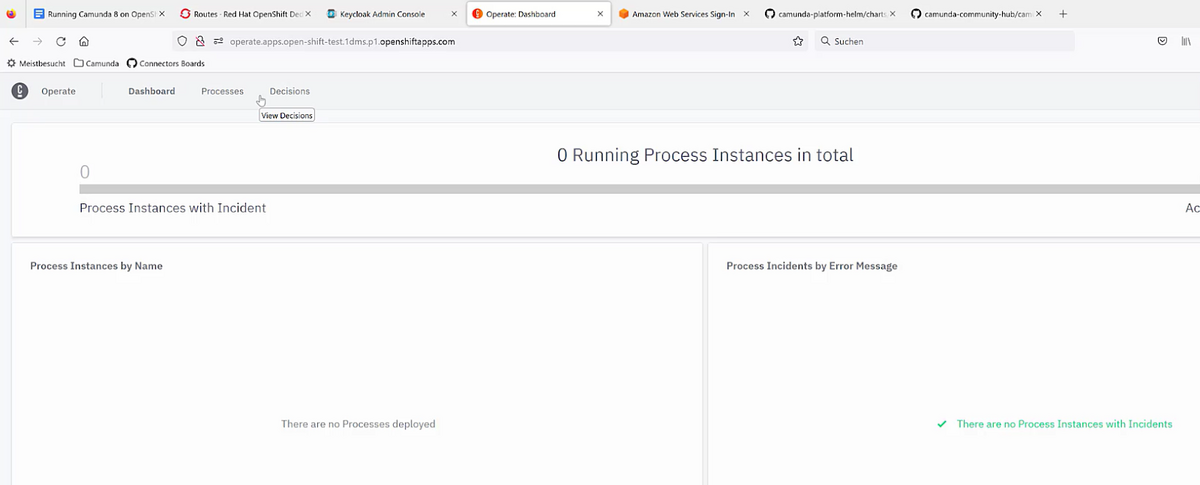
That’s it, now you can access the web apps (e.g. Operate) and will be forwarded to the log in screen:

After login you will see Operate:
Next Steps
To use Camunda Platform 8, you might now develop a process solution and deploy it to the same OpenShift cluster, you could, for example, follow our get started with microservices guide. You could also use normal Kubernetes Port forwarding to talk to Zeebe directly via gRPC, for example from a local development project or Camunda Desktop Modeler.
Summary
Let’s quickly recap: You can install Camunda Platform 8 on OpenShift with ease using the provided Helm charts, but all while respecting certain important configurations for OpenShift, most prominently Security Context Constraints. After adding some routes and users with credentials, you can quickly start orchestrating everything 🙂
In case of any questions or feedback, never hesitate to reach out and post in our forum.


Start the discussion at forum.camunda.io