Do you use Camunda Forms? Have you tried out all the form elements or created custom elements for your forms? We are going to show a few examples of things you can do with Forms to enhance your user experience. You may already know and use some of these, but just in case, here are some examples and a few exercises.
Let’s take some time to inspect some ways to use form fields to enhance your forms.
Using Image View
Adding visuals to your form often makes it both aesthetically pleasing and can also add value by simplifying something for the user. For example, you might want to include a company logo or an image that is pertinent to the form being accessed.
You might want to change that image based on values or calculations. For example, using a stoplight to display good – green, fair – yellow and red – poor. Both of these can easily be accomplished with the use of an Image View form field.
The next section provides a simple example of adding a graphic to a form.
Adding pictures with Image View
Let’s start with something simple, the addition of an image on your form. You can start by creating a form (or using an existing form or the one provided in this github project) and dragging the Image View field to the form canvas.
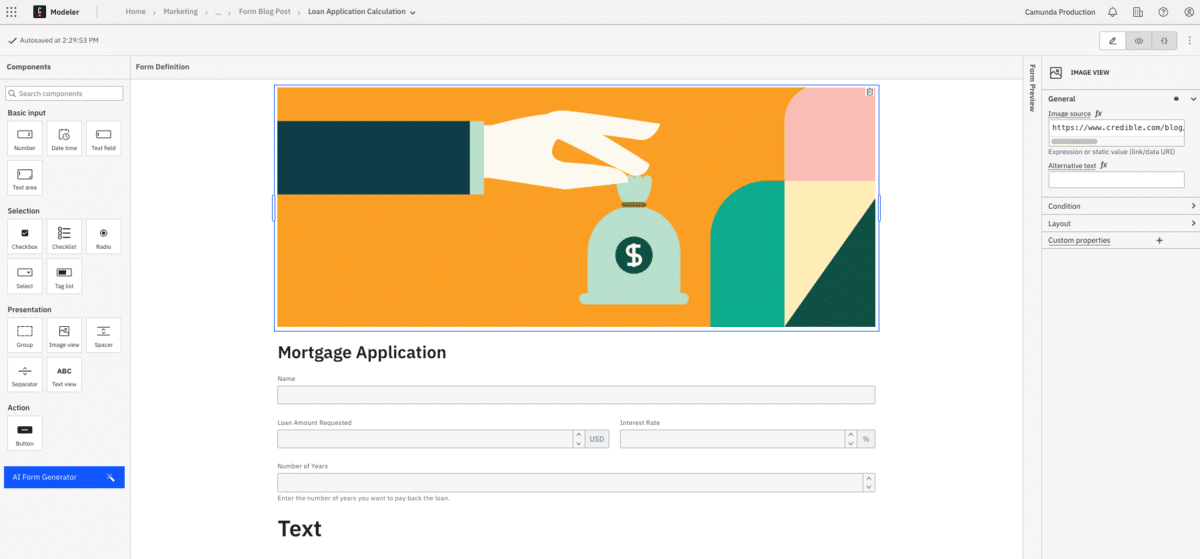
In this example, we are using a very simple form with only a Text view field with the General text of "## Mortgage Application" as shown below. Drag the Image View form field above the existing field to create a location for your image.
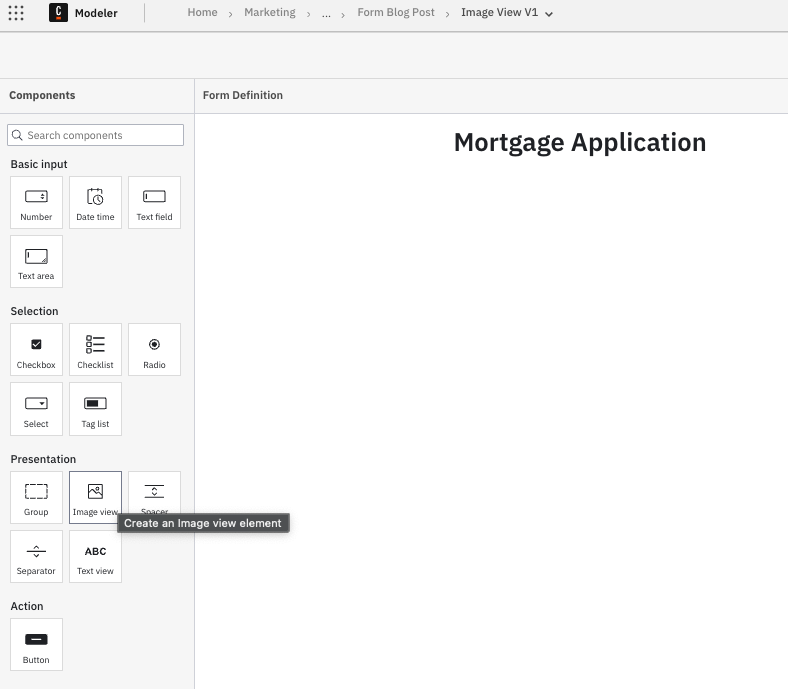
In this case, the image is one that clearly shows that this form is related to a financial transaction and it will span the entire form horizontally. If this was not the case, you can resize the space to accommodate the image size you require.

The “Image source” can be a URI that refers to the image resource to be used or even inline data using something like “data:image/png;base64” which is a png image and is base64 encoded. For this example, we are using a URI:
https://www.credible.com/blog/wp-content/uploads/2019/07/how-to-pay-off-debt.png.

Once this information is entered, the image will appear in the Image View field.

Wow, you did it. Now let’s see how this works. Go to validate mode by clicking on the “eye” as this will allow you to preview the form.
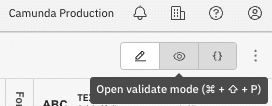
You will see that your form preview looks great displaying a financial image at the top of the form adding a little more context to the form.

Well done. Read on to take a look at what else you can do with images and forms.
Image View to indicate or clarify information with conditions
What if you need more than a logo on your form? For example, you want to include an image that is different depending on some other information that might be entered or calculated on your form. This additional visualization can help the readability and usability of your form. You can take advantage of visibility conditions to control what is displayed to add to the look of your form.
How about you try an example?
In this case, a stoplight figure is going to be used to represent a credit score which ranges from 300 to 800:
- Green stoplight for Excellent/Very Good: 740 to 800
- Yellow stoplight for Good/Fair: 580 to 739
- Red stoplight for Poor: 300 to 579
You can use the previously created form, create a new form or make a copy of an existing form for this exercise. In this case, we are using a form similar to the one previously created.
Create the following field:
- Credit Score (number)
Key:creditScore
Field description:300 - lowest, 800 - highest
Decimal digits:0
Increment:1
Minimum:300
Maximum:800
Our form looks something like this:
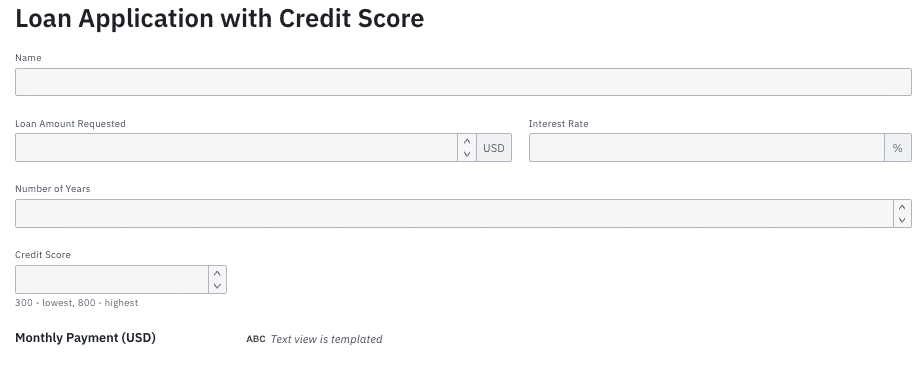
Now, you will create a Group field and then drag three (3) Image View fields into the group to represent the traffic lights of red, yellow and green. First, create a Group to the right of your Credit Score field. Set a condition on this group of creditScore = null . This is very important. Inside this group, drag three (3) Image View fields.
Add inline PNGs to Image View fields
In this case–instead of using a URI–we converted a PNG for each stoplight to base64 using a converter tool like: https://base64.guru/converter/encode/image/png.
- For the first light which is going to be red, copy and paste the following data into the General (Image source) property for the first Image View field.
data:image/png;base64,iVBORw0KGgoAAAANSUhEUgAAAEAAAABACAYAAACqaXHeAAAACXBIWXMAAAsTAAALEwEAmpwYAAAB7UlEQVR4nO2bwWrCQBCG9/EqfQJLLk0mZje2oNDuhqDHnBqtgjEvYB+q9SBon6B462HLLkY8iNmD2rg7P/wQyB4y387sjgMSgkKhUGeQz8R9QPk3UCEv6YCKTUh5izRNARWbSwe/d8TXpGmCawW/M2maAAEIzADAEhC1EGgk5MdjXy69J7ltM231vPB7+p3VZ8BL51WuvK78bdOjXnmxXmMlABqJk8EfQjDJBNI0Qc0Hq7SvC77ywu/bB2BpsPuVv7yufQC2D8wYgFrrNIAfGwEsXS+Bhd9z+xCk+hqMza5Byu0DAPtGKHazEYIqEyjXKa7qXB2Myp+6Fe4b7fzNA4AzmTRNgAAEZgBgCYhaCCFLZDrIZJ5P5GxWaKvndJjpd1afAew5laPxVJZledTj96leYyWAkCUngz+EYJIJpGmCmg9WaV8XfGW11joA+WhiDECttQ5AUcyNAai1TgOY2Qggd70E0qHjh2DIEn3FmVyDndjCaxB2jdApCFY3QrCz2l3dCo8m+mBUflOt8CAz2vmbBwBnMmmaAAEIzADAEhC1EHAeMHb0GgxxHpC53Qrnrv8YKnAeMMd5QOlyCaQ4D0hwHsBwHiBwHgA4DxA4EAGcCAn7RmKB63+aCilvXQVCxNdBJ7n773hRKBSxQn+eAHi3zwaOMAAAAABJRU5ErkJggg==- Add the following condition:
creditScore >= 579
- Add the following condition:
- For the next light which is going to be yellow, copy and paste the following data into the General (Image source) property for the first Image View field.
data:image/png;base64,iVBORw0KGgoAAAANSUhEUgAAAEAAAABACAYAAACqaXHeAAAACXBIWXMAAAsTAAALEwEAmpwYAAAB7UlEQVR4nO1bsW7CMBD15xX1L5oLSSq6MMRRRFiidGmgIBEywVT+pmWoVDp0gzJVYuvs6qxQMSDsSkCDfU96UoRvyD3fnU/OwRiBQCAcATcBv3b88BN8Lk5Jx+cr1w8brG5wfL46tfO/9MIlqxvgXM5XZHUDkACcIgAoBbhSBDeIRNzJRJ4PxGhUSOJznGRyzegaENzFotcfirIs97L/OJQ2RgrgBtFB53dF0IkEVjeA4oUx7FXOb4m2xgmQ9wbaAqCtcQIUxVhbALS1WoCRiQLktqdAnFheBN0gkkeczjHYvDXwGISqETokgtGNEFTE3ZWtcG8gCyPyAVvhTqa18xcvAByJrG4AEoBTBAClAFeK4LUiMZ11xXyRivUmk8TnySyRa0bXgDaPxOtHKr6+7/cS19DGSAG81mHnd0XQiQRWN4DihTHsVc5vOX3qmifA/F29+1u+LFLzBFhv9JxHoq3VAqxMFGBuewpMZondRdD7wzHotwzsA8D2Rggq4u5iiGOeY2FEPr+l8jednb94AeBIZHUDkACcIgAoBbhSBJoP6Ft6Le7SfEBm96ex3PaPowXNB4xpPqC0OQVimg+IaD4goPkATvMBQPcBnC5EgG6EuHlXYo7tf5py/bBxFhG8cOk0o6v/9pdAIDAj8APGtMNtiaqipgAAAABJRU5ErkJggg==- Add the following condition:
creditScore >= 739 or creditScore < 580
- Add the following condition:
- For the third and final light which is going to be green, copy and paste the following data into the General (Image source) property for the first Image View field.
data:image/png;base64,iVBORw0KGgoAAAANSUhEUgAAAEAAAABACAYAAACqaXHeAAAACXBIWXMAAAsTAAALEwEAmpwYAAAB4ElEQVR4nO2bQW7CMBBFfbyi3qIZB6eouypOIxArV6AGChIh5TSlEjcom26h93BlJ1QsqsQLoGE8X/oSAi+Yl7E9fAnGSCQS6QS6i+RtIOJvEFKf04GQey7iDmubAiH35y7+1914x9omuFTxlVnbBARAUgcAbQHZCIFHiU77SmfZTC8WubV5nQ6U/Qz1GRA9pHoyneuiKP709HVu16AEwKOktvhjCC6dwNomaPjCpu2bij/YrEUHIJvMnAGYtegA5PnSGYBZ6zWABUYAme9bIB14fgjyKLFXnMs1GN4jvAahGoTqIKAehKCyebp2FJ7M7MFo/GJG4b5yevJXDwBOZNY2AQGQ1AFAW0A2QqA8YOrpNcgpD1B+j8KZ7z+GcsoDlpQHFD5vgZTygITygIjyAEl5AFAeICkQAUqEpMeRWC/RfDXU4VrpcDsqvVb2PfMZbgCPT5pvnnX4Nf7bG2XX4ATQS+qLP4bg0Ans6gKR1bC5+Mr8bYgQwIdyBmDOBHQAwq1j8cbbsd8A+OcIHwDu+xbgvh+C0EvsFed2DWKcA0Q5CNVCQD0IiUMnSNvi5Shcnvj8XZVt7/Dkrx+AOI1Z2wQEQFIHgM9bIPD9T1NcxJ2LQOjGuyBMbv67XhKJxFDoB5zLfge7tG8hAAAAAElFTkSuQmCC- Add the following condition:
creditScore < 740
- Add the following condition:
The form should have something like this for the group and images.
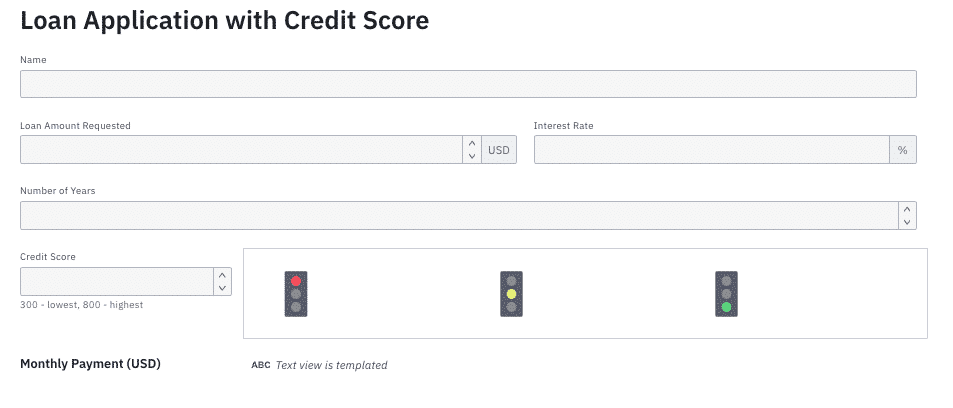
Now you are ready to test your form by going into Validation mode and reviewing the Form Preview to see which light appears based on the entered credit score. In this preview, your group and the stoplights should not appear because the Credit Score doesn’t have a value.
Here are some suggestions to test your form:
- Enter
325for the Credit Score – expected result is red light - Enter
650for the Credit Score – expected result is yellow light - Enter
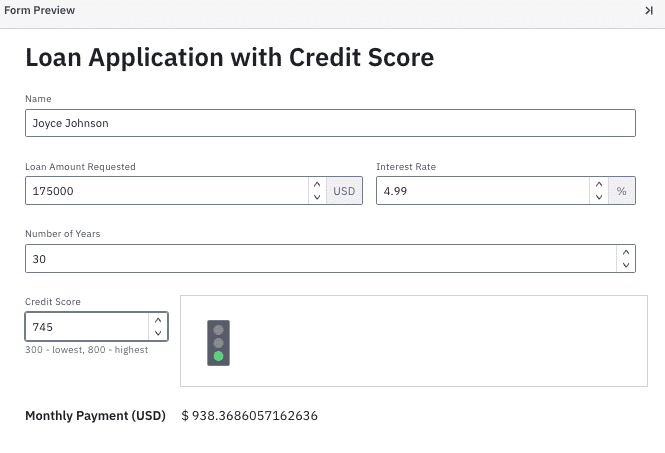
750for the Credit Score – expected result is green light
Here’s an example of what you should see for a green light.
Real-time calculations
Have you ever wished that you could display some more information to the users working with a form to make it easier for them to make decisions? For example, you might want to display a calculation using form field and process variables to provide additional information to the end user.
The next example will perform a calculation using the form variables updating as values are changed on the form.
Loan application calculation example
Using the same form used in one of the previous exercise, add the following form fields:
- Text view (Title of Form)
Text value:## Loan Application - Name (text field)
Key:name - Loan Amount Requested (number)
Key:loanAmount
Suffix in Appearance: USD - Interest Rate (number)
Key:interestRate
Suffix in Appearance:% - Number of Years (number)
Key:numYears - Text view – keep this one empty
Your form should look something like the one shown below:
Now let’s take a look at modifying the final Text view field so that it performs a calculation. In this scenario, it is important that you know the desired formula to be used and that you know all the keys used for each of your form fields.
The mortgage payment calculation for principal and interest is:

Where:
- M = monthly principal and interest payment
- P = principal (loan amount requested)
- r = monthly interest rate, so in our example, this needs to be converted to a decimal (divide by 100) and then to a monthly figure (divide by 12)
- n = loan term in months, so in this example, the number of years for the loan needs to be multiplied by 12
If you follow the instructions in this blog, your field keys will be the same as what appears in the formula below which calculates the mortgage payment using the values provided by the user and then displays them in the last field on the form.
`$`{{ (loanAmount * ((interestRate / 100) / 12)) / (1 - (1 + ((interestRate / 100)/12))^(-numYears*12)) }}
You can simply copy and paste it into the General Text field for the final field in the form.

Wow, you did it. Now let’s see how this works. Go to validate mode to preview the form.
If you look at the Form Preview screen, you will be able to review how changing information affects your calculation.
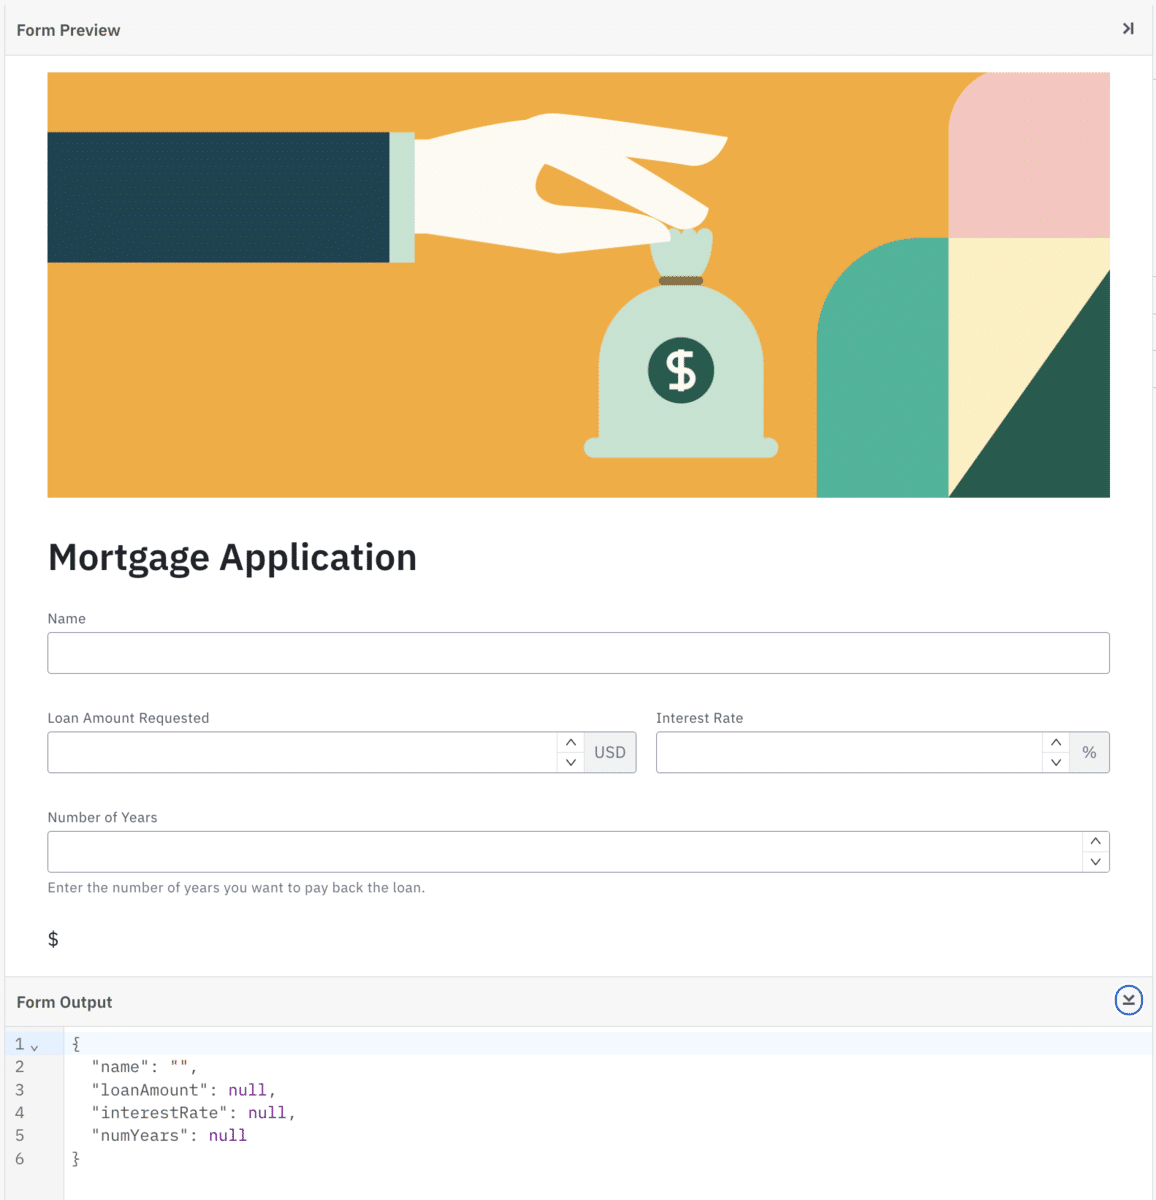
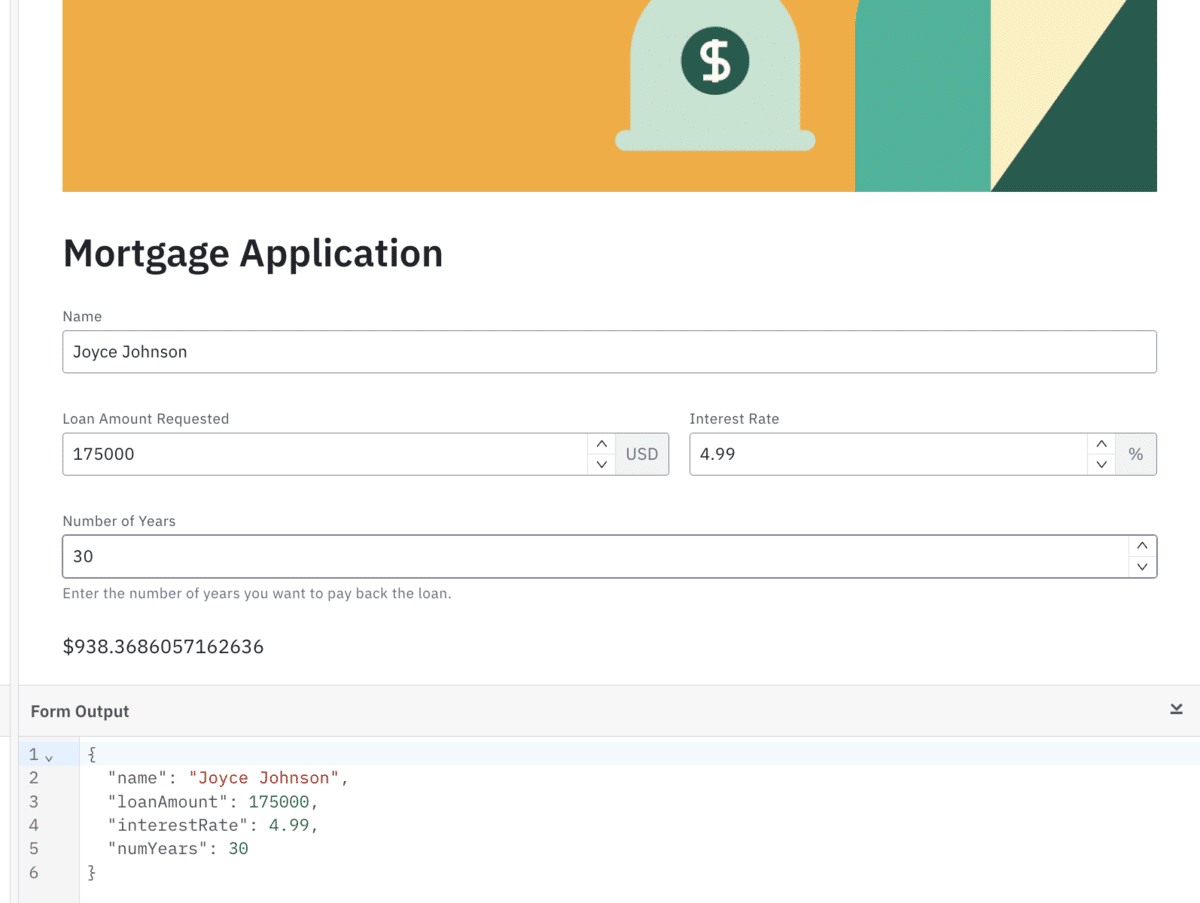
You can start by entering the following information which simulate requesting a 30-year fixed mortgage for $175,000 at a rate of 4.99%:
- Name: your name
- Loan Amount Requested: 175000
- Interest Rate: 4.99
- Number of Years: 30
Notice that as you fill in the form, the values in the Form Output section are updated accordingly. As you enter the Number of Years, you will see both the calculation for “Monthly Payment” change to reflect the calculated amount–in this case $938 and change.
Take it a step further
You are encouraged to make changes to the form to see how the monthly payment calculation updates accordingly. For example, you can modify the FEEL expression to include the floor function to remove all digits after the decimal point in the displayed monthly payment.
Well-Formatted read-only information with Text View
Let’s assume you want to show more information on this form after the data is entered about the mortgage loan request. You can use the Text view field for well-formatted text as well.
The form looks great, but it could use a little bit of finesse and provide more defined information to the user. This is easy enough to accomplish using markdown and additional variable inclusion. Return to Design mode (or use the Form Definition pane in validate mode) and replace the formula with the following text in the final Text view.
#### Requested Loan Information:

##### Loan Details:
   - Loan Type: Personal Loan
   - Loan Amount: $ {{loanAmount}}
   - Loan Term: {{numYears*12}} months
   - Interest Rate Type: Fixed at {{interestRate}}

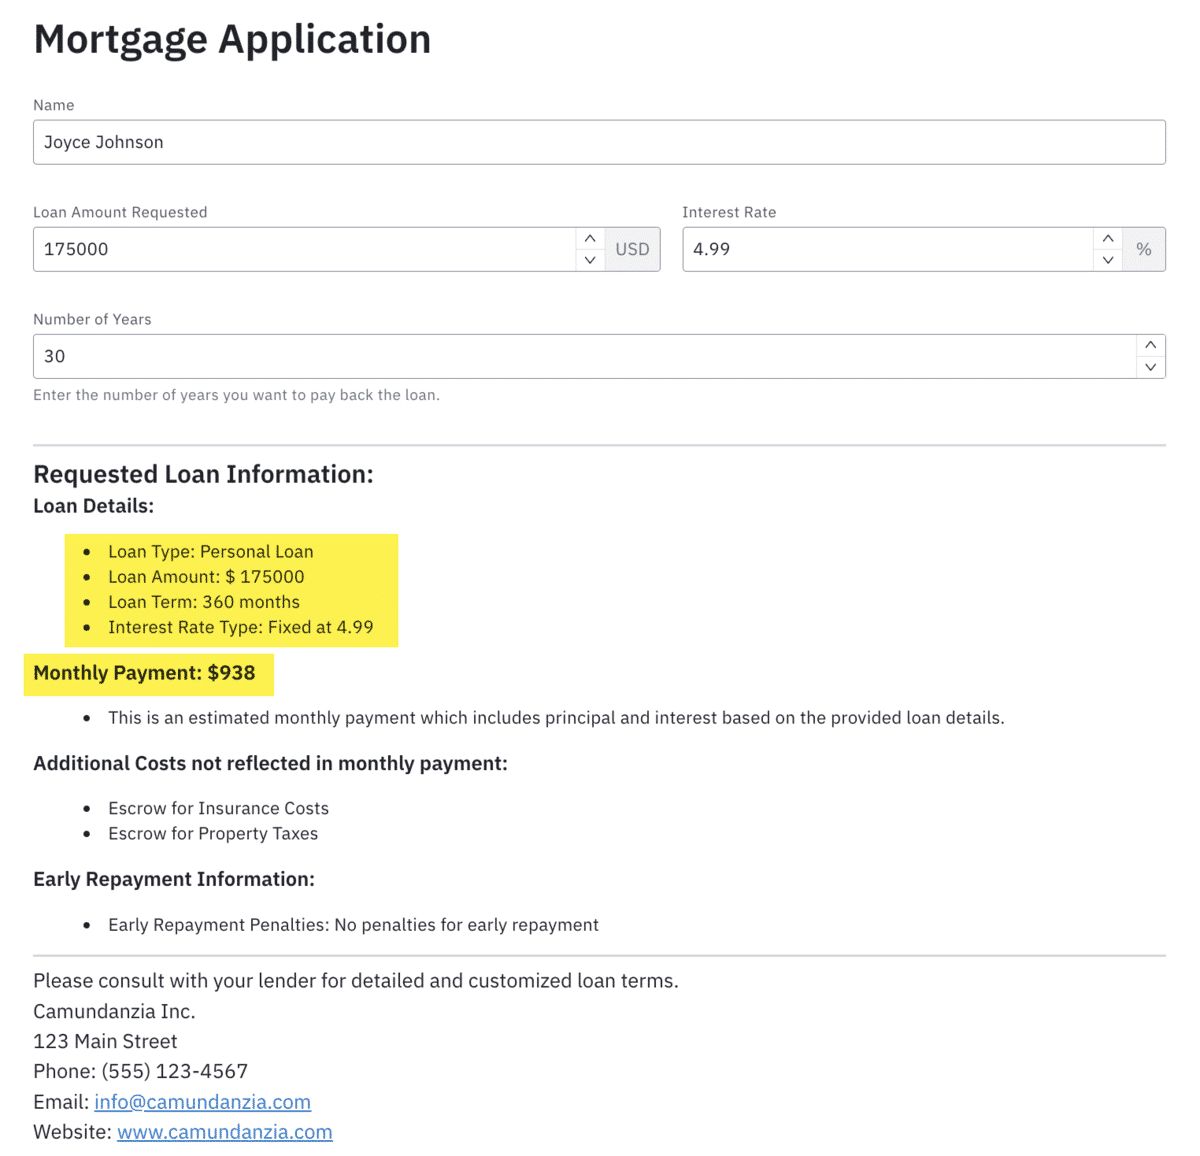
##### Monthly Payment: ${{ floor((loanAmount * ((interestRate / 100) / 12)) / (1 - (1 + ((interestRate / 100)/12))^(-numYears*12))) }}
   - This is an estimated monthly payment which includes principal and interest based on the provided loan details.

##### Additional Costs not reflected in monthly payment:
   - Escrow for Insurance Costs
   - Escrow for Property Taxes

##### Early Repayment Information:
   - Early Repayment Penalties: No penalties for early repayment

------------------------------------------------------------
Please consult with your lender for detailed and customized loan terms.

Camundanzia Inc.
123 Main Street
Phone: (555) 123-4567
Email: [email protected]
Website: www.camundanzia.com
Your form won’t look too different in design mode, but switch to validate mode and look at the preview (you may want to minimize the Form Output pane so you can see more of the form.
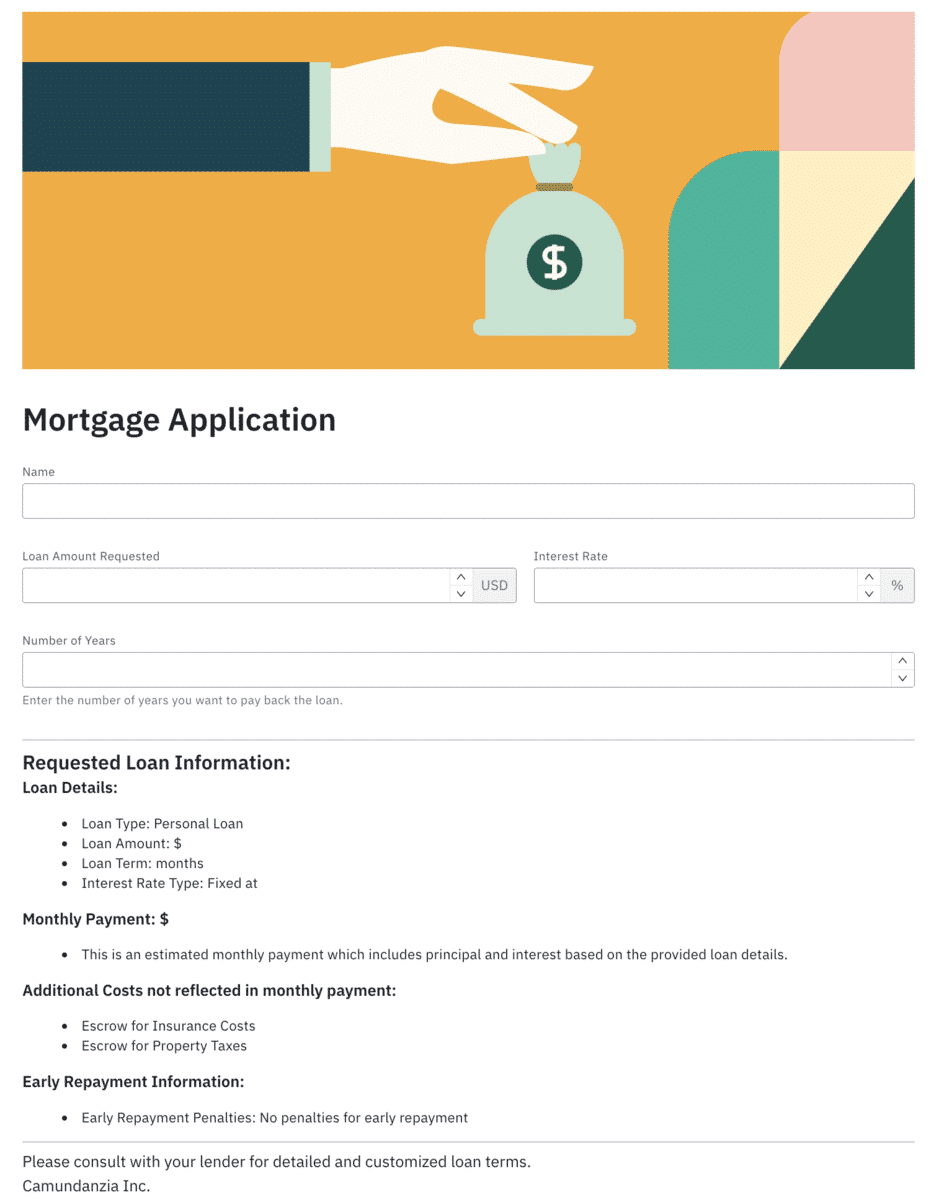
Now, try it out. You can use the same data you entered before or different information and watch the text change at the bottom portion of the form.
You might want to investigate other ways to improve the visuals on your forms using the Text view field.
Custom form components
What if none of these options really fit the bill for what you need or want to do within your form? Camunda also supports the ability to create your own custom form components and use them within your form.
Using the new extension capabilities in form-js, you can extend your forms to include custom components. For example, what about providing the ability to adjust a value using a range bar similar to the one shown below.

Once you create your custom component by defining a custom form component renderer and update the config, you will see your new component appear in Camunda Forms.
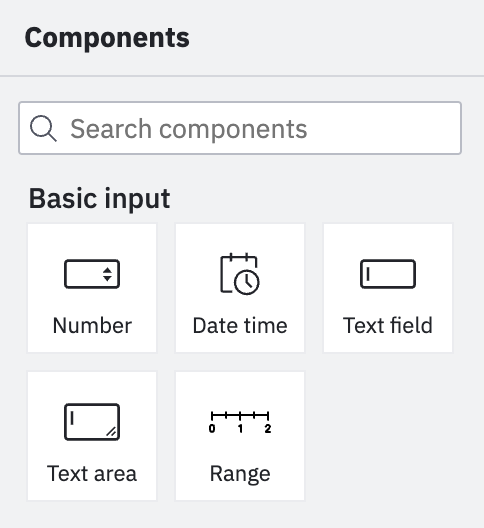
You will also need to create the properties provider to update the properties for this component.
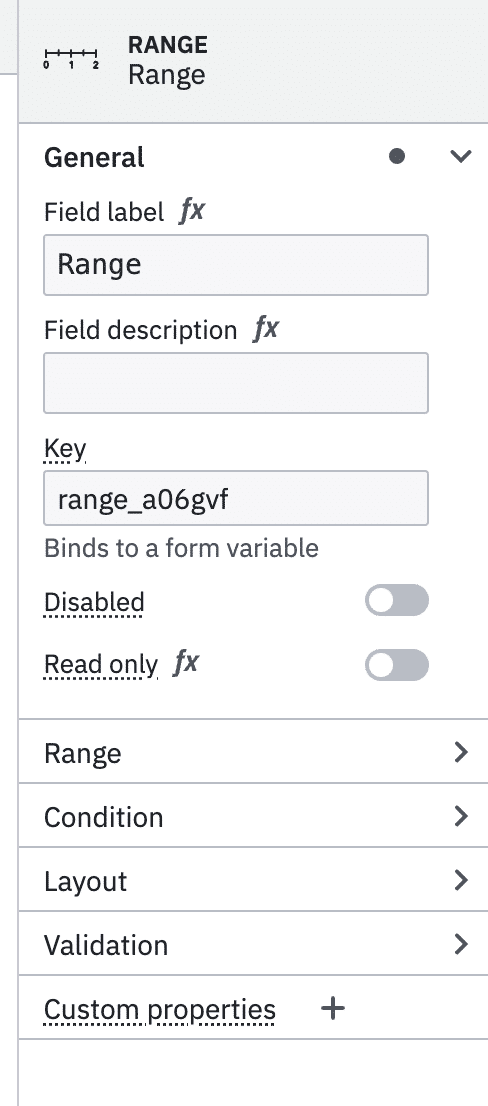
Then you can update the minimum and maximum of the range using the properties dialog in Forms.
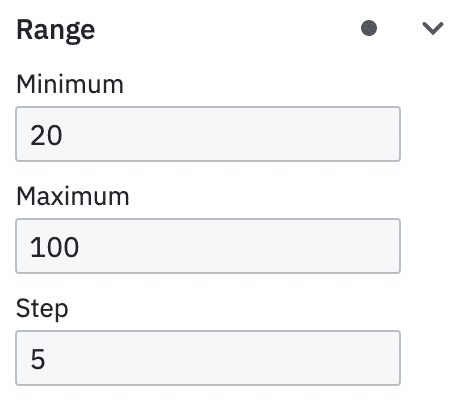
Although not provided in this blog, there are detailed step by step instructions available here as well as assets in github.
Check out the completed forms
If you had any difficulty running into these exercises or simply ran out of time to complete them, you can find the completed forms in this github repository.
Note: Be sure to review the README file for information about what is included.
Further your knowledge
There is so much more you can do with Camunda Forms. For additional reading, we suggest:
- Build Forms Faster with Camunda Form Builder and Generative AI
- From Draft to Perfection Creating Effective Forms for Human Workflows
- Build, preview, and test dynamic forms for user tasks
Try it out
You can try out these forms features today. If you’re new to Camunda, you can dive right in with a free account.
