How many times have you developed a component or service and then realized how applicable it could be to other processes or applications? For example, you might develop a connection to your Customer Relationship Management (CRM) system to extract certain client information so that it can be used in another application, or you might call a REST service to provide data to properly route process flow. What if you wanted to make the component or Connector available to other developers so they wouldn’t have to recreate it or copy the specifications into their own applications or processes?
With Camunda Platform 8, you can create Connector templates and use these to save and publish your own Connector to provide an individualized and reusable component. Once you have saved your Connector in Camunda Modeler, it is available on the designated list of Connectors from within Camunda Modeler. You control where it is published―essentially, who sees it and can use it. Versions are maintained of your standardized Connector template and save other developers time and effort.
With this approach, you can enable your organization to minimize developer time by putting the power of using Connectors in the hands of model users.
- Connectors can be built quickly and easily using a protocol connector as the foundation, such as the REST Connector.
- No need to write code for the Connector because you are configuring it with Modeler based on an existing Connector.
- Variations of a Connector can be created for a particular technology.
- Connectors are reusable across projects and the entire organization.
- You can maintain previous versions of the connector for historical reference.
Build and save your Connector
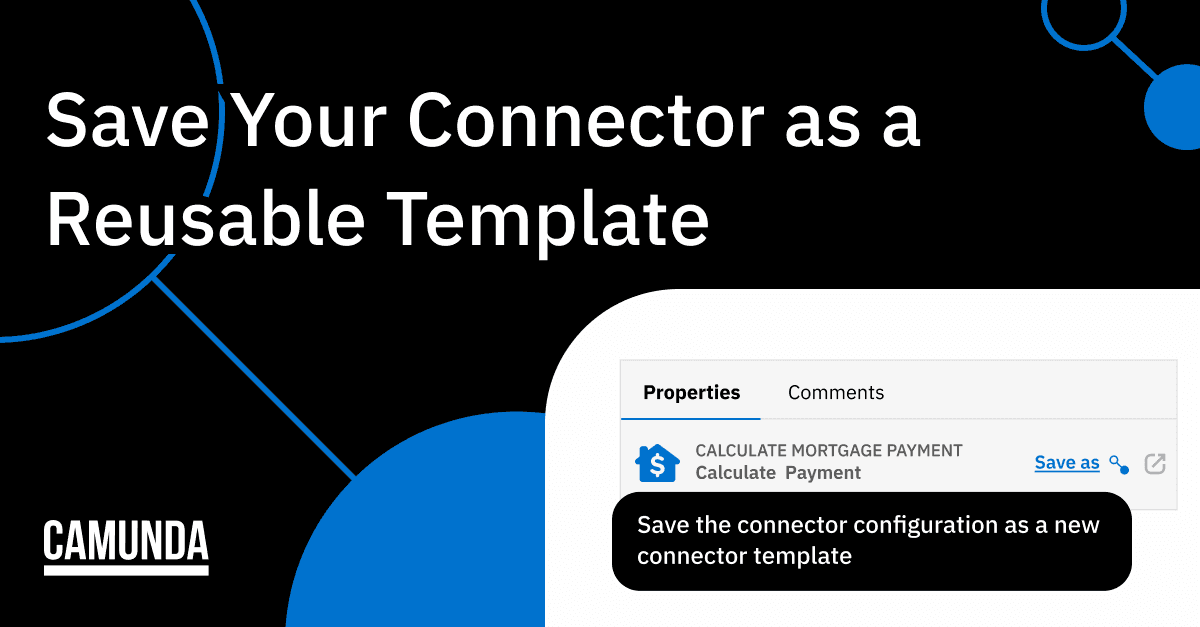
You can build and save your Connector template using an existing connector as a baseline while modeling your BPMN process in Camunda Modeler. Using this method, you can take an existing Connector, like the REST Connector, and update the properties then save it as a new template.

Once you have saved your template, you can edit the new Connector by clicking on “View Connector Template” as soon as your Connector has been saved.

Or you can locate the new Connector template in the Modeler home screen to add a distinct icon and make any other changes.


Finally, you will also want to publish it to either the organization or limit it to a specific project.

When the Connector template is published, you are asked to name the version.

This provides a history of any changes that were made to the Connector between the versions.

If you create a new version, this new version is not deployed to any processes using an older version of the Connector, but new processes will access the newest version when the Connector is added to the BPMN process.
Connector Best Practices
Camunda recommends some best practices when creating Connector templates within your deployment.
Make your Connector discoverable
Once you have configured your Connector, you want to make sure that you provide clear information about its proper usage so it can be used in other processes. For example, give it a concise, but descriptive name. For example, if the Connector will be obtaining a weather forecast using the OpenWeather API, then use something like “OpenWeather API” or if it will calculate a financial payment using the RapidAPI – name it something like “RapidAPI Finance” as shown below.

Be sure to add a descriptive icon for the Connector. This makes it easier to find on the list and can help users take advantage of the functionality.
Security and Permissions
Authentication and credentials are often required when accessing external systems and you want to protect your confidential information. Camunda provides Connector Secrets to store and maintain this information safely and securely. By protecting this information in this way, you are not exposing sensitive information within your BPMN processes.
Using your Connector
Once your connector is available, it is as simple as creating a process and selecting your Connector from the Change element list. As shown previously, having a custom icon and a descriptive name makes finding your Connector straightforward for modelers.

More on Connectors
We encourage you to learn more about Connector templates and building Camunda 8 Connectors by reviewing the following related blogs:
- Unraveling Connector Templates
- How to build a Camunda 8 Connector
- A Deep-Dive into the Architecture of Connectors
Get started today
If you’re new to Camunda, get started and try out our Connectors with a free trial today.


